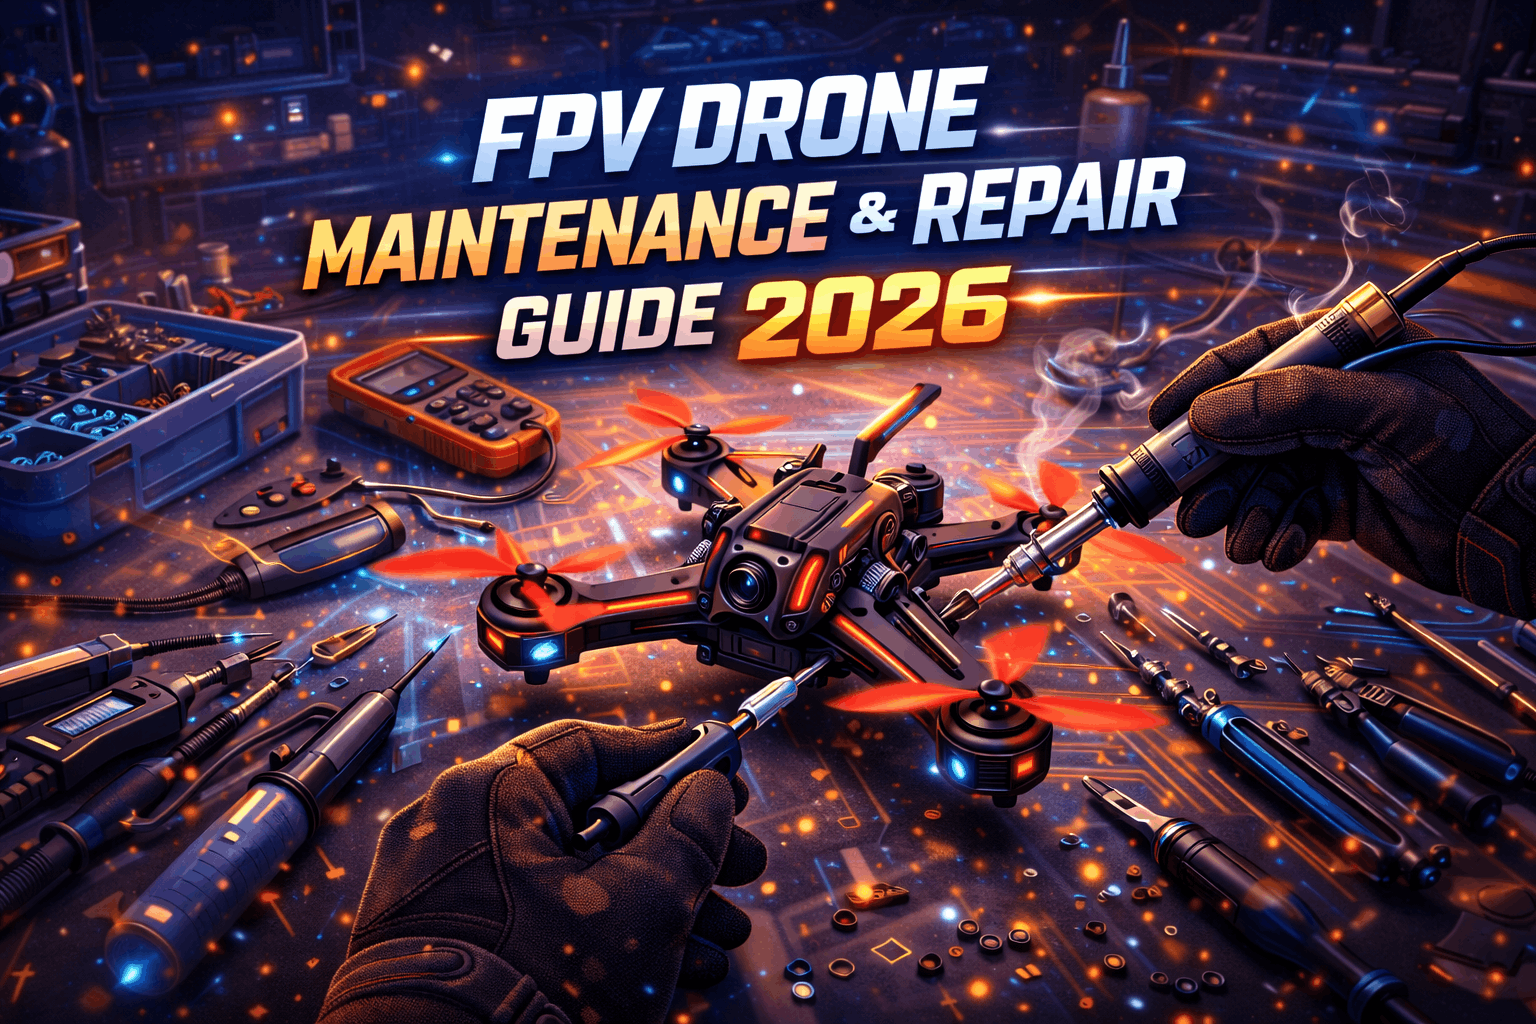
Introduction
Drones break. This is fundamental truth of FPV flying that beginners learn quickly and experts accept completely. Props shatter on impact with trees, gates, or ground. Motors fail after hundreds of flights or one catastrophic crash. Solder joints crack from vibration and thermal cycling. Arms bend under stress. Electronic components fail for mysterious reasons that make troubleshooting frustrating.
The difference between pilots who fly regularly and pilots who own expensive paperweights is approach to maintenance and repair. Successful pilots treat breakage as routine rather than catastrophe. They maintain equipment preventatively to avoid problems before they occur. They diagnose and fix common issues quickly without outsourcing every repair. They know when repair makes sense and when rebuilding is smarter choice.
This comprehensive guide covers the complete maintenance and repair lifecycle. You'll learn preventative maintenance routines that catch problems before they cause crashes. You'll understand how to diagnose common failures systematically rather than guessing. You'll master basic repairs that keep you flying without waiting days for parts or paying someone else. Most importantly, you'll develop judgment about when repairs stop making economic sense and rebuilding becomes better option.
Understanding maintenance and repair transforms FPV from expensive frustration into sustainable hobby. The initial learning curve is real—your first solder joint will be ugly and your first motor replacement will take an hour. But these skills compound over time. Your fifth motor replacement takes fifteen minutes. Your fifteenth is routine. Eventually you spend more time flying than fixing because you've learned to prevent problems and fix them efficiently when they occur.
Note: This guide contains affiliate links. If you purchase through our links, we may earn a commission at no extra cost to you. This helps support our testing and content creation.
Understanding Drone Failure Modes
Why Drones Break
FPV drones operate in hostile environment experiencing stresses that would destroy most consumer electronics quickly.
Physical impact from crashes generates forces measured in dozens or hundreds of Gs depending on speed and angle. Carbon fiber frames are strong but brittle—they crack rather than bend. Motors spinning at 20,000+ RPM experience gyroscopic forces that stress mounting screws. Props flexing during flight create vibration transmitted through entire aircraft.
Electrical stress from high current draw (50-150 amps during aggressive flying) heats components and creates voltage fluctuations. Battery voltage sags under load stressing electronics. Poor solder joints develop higher resistance generating heat that weakens solder further in destructive cycle.
Environmental factors including moisture, dust, and temperature extremes accelerate wear. Flying near ground kicks up dirt infiltrating motors and electronics. Morning dew creates condensation inside electronics. Hot summer days followed by evening flights create thermal cycling that cracks solder joints.
Vibration is silent killer. Motors spinning at high RPM with even slight imbalance create vibration that propagates through frame. This vibration works screws loose, cracks solder joints, and fatigues carbon fiber. Most catastrophic failures trace back to vibration that went unaddressed.
Understanding these failure modes helps you prevent them. Crashes you can't avoid but you can choose landing sites that minimize impact. Electrical stress you manage through proper battery selection and wiring. Environmental damage you mitigate through post-flight cleaning. Vibration you eliminate through proper prop balancing and motor maintenance.
Component Lifespan Expectations
Knowing typical component lifespans helps you plan replacements before catastrophic failure.
Props are consumables lasting anywhere from one flight to dozens depending on flying style and crash frequency. Aggressive racing pilots might break several sets per session. Smooth freestyle pilots get twenty flights from one set. Budget two months maximum per prop set for active flyers. Props are cheap enough that replacing preemptively makes sense.
Motors last 50-200 flight hours depending on quality and flying style. Budget motors might fail after thirty hours of aggressive flying. Quality motors like XING2 or T-Motor easily exceed one hundred hours. Bearing failure is most common mode—motors develop grinding sound and resistance when spinning. Plan to replace 1-2 motors annually for typical flying frequency.
ESCs fail less predictably. Quality ESCs can last hundreds of hours. Cheap ESCs might fail after a dozen flights. Heat and current spikes cause most failures. Proper sizing (using 45A ESC for peak draws of 35A) extends life dramatically. Budget to replace one ESC per year on average.
Flight controllers rarely fail from wear—they fail from crashes or electrical problems. A quality flight controller that survives infant mortality period (first dozen flights) often lasts years. When they do fail, it's usually catastrophic rather than gradual degradation. Keep spare on hand but don't expect regular replacement.
Frames last indefinitely if you avoid crashes and catch cracks early. Arms crack at stress points near body. These cracks propagate slowly at first then catastrophically. Inspect monthly and replace cracked arms immediately. Full frame replacement is typically crash-related rather than wear-related.
Batteries degrade with every charge cycle. Expect 100-300 cycles depending on how you treat them. Flying to cutoff voltage stresses batteries. Storing at storage voltage extends life. Charging at 1C rather than 2C reduces degradation. Budget eighteen months for active battery before capacity drops enough to affect flight times noticeably.
Preventative Maintenance Routines
Pre-Flight Inspection Protocol
Spending five minutes before each flight prevents ninety percent of mid-flight failures that ruin sessions.
Visual frame inspection starts with running fingers along each arm feeling for cracks invisible to eye. Carbon fiber cracks often develop on inner surfaces where you can't see them. Gentle pressure reveals cracks through slight flexing. Pay particular attention to arm bases where they attach to body—this is highest stress point. Micro-cracks appear as subtle lines in carbon weave. Any crack, however small, will propagate. Mark it for monitoring or replace arm immediately.
Motor inspection requires spinning each motor by hand without power connected. Healthy motor spins freely with smooth feel and quiet sound. Grinding, resistance, or clicking indicates bearing failure. Even slight grinding is warning sign—bearings don't improve, only worsen. Note which motor shows symptoms for post-flight investigation. Flying on failing motor risks catastrophic failure mid-flight where rotor separates from stator or bearing seizes causing drone to drop.
Propeller examination involves both visual inspection and physical testing. Look for stress cracks at prop root near mounting hole—these are invisible until you flex prop slightly. Bent props obvious from side profile—they don't lie flat. Cracked props are immediate replacement regardless of how minor crack appears. Bent props can sometimes be carefully straightened if no cracks exist but replacement is safer. Spin each prop while mounted checking for wobble indicating imbalance or loose mounting.
Battery assessment starts before installing on drone. Feel battery temperature—it should be ambient temperature or slightly warm from storage area. Hot battery indicates internal problem or insufficient cooling time since last use. Never fly hot battery. Check for swelling by looking at battery profile from side—puffed batteries show bulging rather than flat rectangular profile. Inspect connector for corrosion or damage. Check voltage with battery checker or multi-meter confirming it matches expected voltage for state of charge.
Electrical connection verification takes thirty seconds but prevents frustrating crashes. Wiggle battery connector gently while watching FPV feed—any flicker indicates loose connection. Check that all antennas are secured and properly oriented. Verify camera mounting is tight without play. Look for any loose wires that could interfere with props during flight.
Electronics quick test involves powering up without arming and checking all systems respond. Flight controller should boot normally indicated by LED pattern or beep sequence. FPV feed should appear clear without static. Transmitter should show strong signal strength. OSD should display battery voltage and other telemetry data if configured. Any anomaly gets investigated before attempting flight.
This complete pre-flight takes five minutes for experienced pilots, ten minutes for beginners. The time investment prevents hours of troubleshooting after preventable failure ruins your flying session.
Post-Flight Maintenance
Proper post-flight maintenance extends component life and catches developing problems early.
Battery cooling before charging is critical for longevity. Batteries arrive from flight hot—internal resistance generates heat during discharge. Charging hot battery accelerates degradation and risks damage. Allow minimum thirty minutes cooling time, ideally one hour. Feel battery—it should return to ambient temperature before charging. This discipline extends battery life by 30-50% over pilots who charge immediately.
Visual damage inspection immediately after landing identifies problems while you remember what happened during flight. Look for obvious damage like cracked arms or loose components. Check props for new cracks that developed during flight even without crashes—vibration and stress cause gradual crack propagation. Note any anomalies in flight log mentally or physically for deeper investigation.
Component temperature check involves carefully touching motors, ESCs, and VTX after flight. Motors should be warm but not painfully hot to touch. If you can't hold finger on motor casing for three seconds, it's overheating. Hot motors indicate bearing problems, insufficient cooling, or electrical issues. ESCs similarly should be warm but not concerning hot. Overheating components need investigation before next flight.
Wiring inspection looks for any rubbing, chafing, or movement during flight. Wires that contact frame or props get damaged over time. Zip ties that came loose need replacement. Solder joints near high-vibration areas like motor wires should be checked for work-hardening cracks.
Flight log review if you record telemetry provides data-driven maintenance insights. Notice voltage sags indicating battery age. Watch motor temperatures across flights to detect gradual bearing degradation. Monitor vibration levels—increasing vibration warns of imbalance or loose components.
This post-flight routine takes five minutes but provides early warning of problems before they cause crashes.
Monthly Deep Maintenance
Monthly maintenance sessions catch problems that don't show up during quick pre-flight inspections.
Motor bearing assessment requires removing props and spinning each motor by hand. Healthy bearings spin smoothly for several seconds before friction stops rotation. Grinding, clicking, or binding indicates wear. Spin motor slowly feeling for notchy resistance at specific positions—this indicates bearing damage. If motor feels rough, decide whether to fly one more session or replace immediately based on severity. Err toward replacement—bearings don't improve.
Solder joint inspection with magnification reveals developing problems invisible to naked eye. Cold solder joints appear dull and grainy rather than shiny and smooth. Cracked joints show visible separation between solder and component. High-stress joints like motor wires and battery connectors need particular attention. Reflowing questionable joints takes ten minutes but prevents mid-flight failure from vibration propagating crack.
Frame stress analysis involves flexing arms gently while looking for movement at joints. Check arm mounting screws for looseness—vibration works screws loose over time. Inspect carbon fiber for delamination where layers separate. Look at high-stress areas including arm bases, camera mounting points, and battery pad attachment. Small cracks propagate quickly under stress.
Propeller balancing using simple prop balancer tool identifies unbalanced props causing vibration. Spin prop on balancer—it should stay wherever positioned indicating balance. Unbalanced prop rotates to heavy side. Mark heavy blade and remove material with sandpaper at tip until balanced. Replace props that can't be balanced—the manufacturing defect will cause vibration regardless of balancing efforts.
Electrical system inspection includes checking battery voltage sag under load by hovering and noting minimum voltage reached. Compare to previous flights—increasing sag indicates battery degradation. Clean all connectors with isopropyl alcohol removing oxidation. Verify all screws are tight including motor mounting screws and arm attachment screws.
Firmware and configuration backup is often forgotten maintenance. Export Betaflight configuration to file. Save transmitter settings. Document any custom mixes or settings. Having backup prevents starting from scratch after flight controller failure.
This monthly session takes thirty minutes to one hour but significantly extends component life through early problem detection.
Seasonal Deep Maintenance
Every three to six months depending on flying frequency, comprehensive deep maintenance addresses accumulating wear.
Complete disassembly down to major components provides access to areas inaccessible during normal inspection. Remove battery, props, camera, video system, and FC/ESC stack. This exposes frame interior and component undersides where damage and wear hide.
Thorough cleaning with compressed air and isopropyl alcohol removes accumulated dirt, dust, and debris. Dust infiltrates everywhere—inside motor bells, between frame layers, around electronics. This contamination conducts electricity causing shorts and absorbs moisture causing corrosion. Blow out dust from motor bells being careful not to spin motors at high speed with compressed air. Clean all electronic components with isopropyl alcohol on cotton swabs.
Connector maintenance involves disassembling major connectors, cleaning contact surfaces, and checking for corrosion. Battery connectors accumulate oxidation reducing current capacity. Motor connectors can develop corrosion from moisture. Clean thoroughly and replace any heavily corroded connectors.
Antenna system inspection verifies coax cables haven't developed breaks from flexing. Check antenna mounting security—loose antennas rotate during flight reducing range. Verify polarization matches between VTX and goggle antennas if you have multiple drones and goggles.
Component retightening addresses vibration-induced loosening. Motor mounting screws need threadlocker but still work loose over time. Check every screw on drone methodically tightening any that have loosened. Don't overtighten carbon fiber—it cracks under excessive torque.
Calibration and configuration refresh includes IMU calibration in flight controller, ESC calibration if needed, and verification all settings are optimal. Tuning drifts over time as components age. Fresh calibration and tune refresh restores optimal flight characteristics.
This seasonal maintenance takes two to three hours but effectively rebuilds reliability back to like-new condition.
Systematic Troubleshooting by Symptom
Drone Won't Arm
Arming failure is most common troubleshooting situation. Systematic approach identifies cause quickly.
Check battery voltage first. Flight controllers prevent arming if battery voltage too low protecting battery from overdischarge. Confirm battery shows expected voltage for state of charge—freshly charged 4S should show 16.8V, 6S should show 25.2V. If voltage low, charge battery before troubleshooting further.
Verify transmitter connection by checking signal strength in flight controller configurator or OSD. No signal from transmitter prevents arming. Confirm transmitter is bound to receiver, receiver is properly connected to flight controller, and signal is being received. Check receiver LED if visible—most show solid or blinking light when receiving signal.
Review flight mode configuration ensuring you're in correct mode for arming. Some configurations require specific switch position for arming. Check that arm switch is properly assigned and functioning. Move arm switch watching for response in configurator.
Examine accelerometer calibration which if incorrect prevents arming as safety feature. Flight controller won't arm if it thinks drone is tilted excessively. Place drone on level surface and recalibrate accelerometer if needed.
Check arming prevention flags in flight controller showing exactly why arming is blocked. Betaflight and other firmware display arming disabled reasons in configurator. Common flags include "RPMFILTER" (RPM filtering not working), "RXLOSS" (lost receiver signal), "ANGLE" (drone too tilted), and others. Address specific flag shown.
Investigate hardware issues if software checks pass. Loose flight controller preventing accelerometer from reading correctly. Damaged receiver not communicating properly. Bad solder joint causing intermittent connection. Methodically verify each component functions.
Weak or Dead Motor
Single motor not spinning or spinning weakly indicates specific failure needing targeted repair.
Identify which motor is problematic by spinning each by hand. Dead motor won't spin at all. Weak motor shows resistance or grinding. This confirms physical problem rather than electrical in most cases.
Check motor wiring by visually inspecting solder joints at ESC. Look for cold joints, cracks, or loose connections. Wiggle wires gently watching for movement at joint indicating poor connection. Reheat and resolder any questionable joints.
Test motor directly by disconnecting from ESC and applying power from battery with limiting resistor or testing via configurator motor test function at low throttle. Motor should spin smoothly. If it doesn't, motor itself is damaged requiring replacement. If it spins normally during direct test, ESC is suspect.
Examine ESC for failure by swapping motor to different ESC output. If motor now works, original ESC output is damaged. If motor still doesn't work, motor is confirmed bad. ESC failures are less common than motor failures but do occur from overcurrent or shorts.
Inspect flight controller configuration ensuring motor output is enabled and properly mapped. Incorrect motor mapping can cause motor to appear dead when configuration is actually problem. Verify motor protocol (DShot, Multishot, etc.) is correctly set.
Replace failed component once isolated. Motors cost $20-50 each. ESCs cost $15-40 individually though often require replacing entire 4-in-1 ESC unit. Flight controllers rarely fail affecting single motor output—usually entire FC fails if damaged.
Video Feed Issues
Video problems range from minor static to complete loss affecting flying ability dramatically.
Identify whether problem is transmit-side (on drone) or receive-side (in goggles) by testing different goggles with same drone or different drone with same goggles. This isolates which side has issue guiding troubleshooting.
Check antenna connections first as most common cause. Loose VTX antenna causes signal loss and potentially VTX damage from reflected power. Verify antenna is screwed tight and properly oriented. Check goggle antennas similarly. Damaged antennas need replacement—they don't work marginally, they fail.
Verify VTX power output settings in flight controller ensuring VTX isn't set to zero or pit mode accidentally. Many VTXs default to 25mW or pit mode on first boot. Check that output power matches expectations (200mW, 600mW, etc. depending on your setup).
Examine camera settings if image is present but poor quality. Exposure settings might be wrong causing washed out or dark image. Camera angle might have shifted affecting view. Lens could be dirty or damaged obscuring image.
Investigate power supply issues affecting video system. VTX and camera need clean filtered power. Voltage sag or noise causes video artifacts. Check that filtering capacitor on VTX power line is present and functioning. Verify voltage supply meets VTX requirements.
Test different channels and frequencies as RF interference can affect specific channels more than others. If video clears up on different channel, original channel has interference in your area. Switch permanently to clearer channel.
Replace failed components once identified. Cameras cost $20-60. VTXs cost $30-80. Antennas cost $15-30. Testing with spare components speeds diagnosis when possible.
Vibration Issues
Excessive vibration manifests as shaky video feed, poor flight characteristics, and accelerated component wear.
Identify vibration source by process of elimination. Remove props and check if vibration persists in video or feel. If vibration gone without props, problem is prop-related. If vibration remains, problem is in electronics or mounting.
Balance props using prop balancer tool. Place prop on balancer—unbalanced prop rotates to heavy side. Mark heavy blade and sand tip gradually until balanced. Replace props that can't be balanced within reason. Even slightly unbalanced props cause noticeable vibration at high RPM.
Check motor bearings by spinning each motor by hand. Rough or grinding bearings create vibration even when balanced props are installed. Failing bearing is immediate replacement—it will not improve and affects flight quality.
Verify motor mounting screws are tight. Loose motor vibrates even with perfect bearings and balanced props. Check all four screws on each motor. Use threadlocker to prevent screws working loose from vibration.
Examine soft mounting between flight controller and frame. Flight controllers should be soft-mounted (rubber grommets or pads) to isolate from frame vibration. Hard-mounted flight controllers transfer frame vibration directly to gyroscope causing poor flight performance.
Inspect frame for cracks causing flexing during flight. Cracked arms flex creating vibration that manifests throughout aircraft. Even small cracks enough to cause noticeable vibration. Replace any cracked arms.
Review flight controller filtering configuration. Inappropriate filter settings can't eliminate vibration caused by mechanical problems but proper filtering helps compensate. Gyro filters and notch filters should be properly configured for your motor configuration and frame characteristics.
Loss of Control or Erratic Behavior
Intermittent control loss or erratic response indicates serious problem requiring immediate investigation.
Ground drone immediately for safety. Erratic behavior risks crash or flyaway. Don't attempt to "fly through it" hoping problem resolves—it will worsen.
Check battery and power connections first. Loose battery connector causes voltage fluctuations appearing as erratic control. Wiggle connector while powered on watching for brownouts or restarts. Reseat connector firmly and secure with strap.
Verify transmitter battery level. Low transmitter battery causes signal degradation and control problems. Replace transmitter batteries or charge internal battery. Don't assume problem is on drone side—transmitter issues cause similar symptoms.
Examine receiver wiring and antenna. Damaged receiver antenna dramatically reduces control range. Check that receiver is properly wired to flight controller with power, ground, and signal connected correctly. Verify antenna isn't damaged or pinched.
Review flight controller logs if available. Modern flight controllers log data revealing what happened during erratic behavior. Look for voltage drops, receiver signal loss, gyroscope errors, or other anomalies correlating with control problems.
Test control system on ground by connecting to configurator and moving sticks watching receiver response. Should see immediate accurate response. Delayed or incorrect response indicates receiver or wiring issue.
Rebuild control link if problems persist. Rebind receiver to transmitter. Verify correct protocol settings. Update receiver firmware if available. Check that transmitter model is configured correctly. These steps eliminate software and configuration issues.
Common Repairs with Detailed Procedures
Propeller Replacement
Props are most frequently replaced component making this repair routine.
Assess prop condition before every flight and immediately after crashes. Look for cracks at prop root near mounting hole—these are structural failure points. Check tips for damage reducing efficiency. Examine overall profile for bends affecting balance.
Remove damaged props by loosening prop nuts counterclockwise on clockwise-rotating motors and clockwise on counterclockwise-rotating motors. Props tighten themselves during flight so removal requires moderate force. Use proper prop tool preventing nut rounding.
Select replacement props matching specifications of original. Props are designated by size (5031 means 5-inch diameter, 3.1-inch pitch) and material (usually polycarbonate or stronger materials). Use same specs as original unless intentionally changing performance characteristics.
Install new props noting proper orientation. Props are marked for rotation direction and position. "R" or "CW" props install on clockwise-rotating motors. "L" or "CCW" props install on counterclockwise-rotating motors. Incorrect installation causes drone to flip on takeoff.
Tighten prop nuts firmly but not excessively. Props should be secure enough they won't come loose during flight but not so tight you risk stripping threads. Hand-tight plus quarter turn with tool is generally adequate.
Test new props by spinning each by hand checking for clearance and secure mounting. Then do brief hover test before aggressive flying confirming no vibration or balance issues.
Motor Replacement
Motor replacement is intermediate repair requiring soldering but provides substantial cost savings versus buying new drone.
Diagnose motor failure by spinning by hand without power. Failed bearings show grinding, clicking, or resistance. Complete failures don't spin at all. Confirm motor is problem rather than ESC by testing motor on different ESC output or testing ESC with different motor.
Remove failed motor starting with prop and prop nut. Unscrew four motor mounting screws holding motor to arm. Note wire routing before desoldering—you'll reinstall new motor same way.
Desolder motor wires from ESC using soldering iron and solder sucker or desoldering braid. Heat joint until solder melts then remove solder with sucker or braid. Work quickly to avoid heat damage to ESC. Once all solder removed, motor wires pull free.
Select replacement motor matching original specifications. Motors designated by size (2207 means 22mm stator diameter, 7mm stator height) and KV rating (2450KV produces certain RPM per volt). Match or use equivalent specifications from quality manufacturer.
Install new motor by routing wires through arm similar to original. Position motor on mounting holes and insert screws from bottom. Tighten screws using threadlocker to prevent loosening. Don't overtighten—you're screwing into aluminum motor housing that strips easily.
Solder motor wires to ESC following color coding if present or noting which wire went to which pad originally. Different motor rotation requires different wiring—motors have three wires that can be connected any orientation, but swapping two wires reverses direction. Consult motor direction diagram before soldering.
Test new motor using configurator motor test at low throttle confirming it spins in correct direction. If direction wrong, swap any two motor wires. Once direction confirmed, test spin smoothly, verify balance, then return to normal flight.
Solder Joint Repair
Cracked or cold solder joints cause intermittent failures that are frustrating to diagnose but simple to fix.
Identify suspect joints by visual inspection looking for dull appearance, cracks, or movement when wiggled gently. Cold joints appear rough and grainy. Cracked joints show visible separation. Also suspect joints in high-vibration areas especially motor wires and battery connectors.
Prepare work area with proper ventilation and lighting. Clean area around joint with isopropyl alcohol removing flux residue and contamination. Secure component so it doesn't move during repair.
Heat original joint with soldering iron until solder melts completely. Add fresh solder with flux ensuring it flows smoothly combining with original solder. Molten solder should flow freely over pad and component lead creating shiny smooth connection.
Remove iron and let joint cool without movement. Joint transitions from shiny liquid to matte solid as it cools. Any movement during cooling creates cold joint requiring rework. Hold component steady or use helping hands until fully solidified.
Inspect repaired joint verifying shiny smooth appearance without cracks or gaps. Joint should have small fillet shape between pad and component—not ball of excess solder but not starved of material either. Clean flux residue with isopropyl alcohol.
Test electrical continuity with multimeter if joint is part of power or signal path. Should measure zero or near-zero resistance for power joints. Signal joints should show expected voltage or continuity depending on application.
Frame Arm Replacement
Cracked arms need replacement before crack propagates causing catastrophic failure mid-flight.
Assess arm damage by flexing gently and looking for cracks. Small cracks at arm base will spread. Cracks anywhere along arm length indicate stress fracture. Replace arm even if crack seems minor—it will worsen.
Disassemble components from damaged arm starting with motor, then camera or other mounted items. Note motor wiring routing and component placement for reinstallation. Take photos if necessary.
Remove arm from main frame body by unscrewing mounting screws. Most frames use four screws securing each arm. Frames vary in design—some have arms that slide into body, others use standoff mounting, some are unibody where arms don't separate.
For frames with replaceable arms, install new arm by reversing removal process. Position arm correctly noting orientation and alignment. Insert mounting screws with threadlocker. Tighten progressively in crossing pattern distributing force evenly.
Reinstall components on new arm matching original positions. Mount motor with threadlocker on screws. Route wiring as originally done. Reattach camera mount or other accessories.
Test structural integrity by flexing arm gently comparing feel to other arms. Should be solid without excessive flex. Visual inspection should show no gaps at mounting points.
ESC Replacement
ESC failure less common than motor failure but requires similar repair process.
Diagnose ESC failure by determining if problem affects one motor, multiple motors, or entire ESC stack. Single motor affected suggests individual ESC failure on 4-in-1 unit. No motors working indicates power supply or ESC board failure.
Remove failed ESC starting with desoldering all motor wires. Note which motor connects to which pad—you need to reconnect identically. Desolder battery power wires and flight controller connections. Work methodically preventing confusion during reassembly.
For 4-in-1 ESC, entire board requires replacement even if single output failed. Individual ESCs can replace just failed unit. Unmount ESC from frame noting how it was positioned and mounted. Soft mounting or metal standoffs will need reinstalling with new ESC.
Select replacement ESC matching specifications. Current rating (45A, 60A, etc.) should meet or exceed original. Voltage rating must handle your battery (6S-rated for 6S batteries). Firmware (BLHeli_S, BLHeli_32) should match flight controller expectations though these are generally compatible.
Install new ESC by mounting to frame using original mounting method. Connect battery power wires—positive to positive, negative to negative. Connect flight controller signal wires matching motor numbers. Double-check wiring before applying power.
Solder motor wires to ESC outputs following original motor numbering. Motors 1-4 have standard positions on flight controllers. Wiring diagram available in flight controller or ESC documentation. Triple-check motor numbering—error causes flip on takeoff.
Configure ESC using Betaflight or ESC configurator if needed. Modern ESCs often auto-configure but some require protocol selection or calibration. Test each motor individually using configurator motor test verifying correct rotation and smooth operation.
Building Repair Skills Over Time
Beginner Level Repairs
Start with simple repairs requiring minimal tools and expertise.
Propeller replacement builds confidence handling components without risk of expensive damage. Props are cheap and easy to replace. Make intentional mistakes during practice—install prop backwards, don't tighten enough, overtighten—then correct. This experiential learning teaches proper technique.
Battery connector cleaning requires no special skills but teaches careful component handling. Disassemble connector, clean with alcohol, reassemble noting which parts go where and proper orientation. These simple procedures build confidence for complex repairs later.
Visual inspection and tightening loose screws develops systematic approach to maintenance. Make checklist and follow it methodically. Note which screws loosen over time. This establishes maintenance habit preventing bigger problems.
Intermediate Level Repairs
Progress to repairs involving disassembly and basic soldering.
Motor replacement is pivotal skill teaching soldering and mechanical assembly. First replacement will be slow and stressful. Fifth replacement will be routine. Expect to spend one hour on first motor replacement. Eventually fifteen minutes is normal. Use quality motor and take time doing it right.
Simple wiring repairs like resoldering loose battery connectors or camera wires develop soldering proficiency. Start with low-stakes joints that can be redone if quality poor. Graduate to critical joints once confidence develops. Every solder joint improves your technique.
Frame arm replacement teaches frame-specific assembly procedures. Each frame design is slightly different. Learning your specific frame's assembly develops intimate knowledge of your equipment enabling faster future repairs.
Advanced Level Repairs
Advance to complex repairs after mastering intermediate skills.
Flight controller repair or replacement involves working with delicate electronics and complex wiring. Document everything before disassembly. Take photos of wiring from multiple angles. Note which wire goes where. FC replacement requires reproducing exact original configuration.
ESC diagnosis and replacement requires electrical knowledge and systematic troubleshooting. Testing ESC outputs with multimeter. Understanding motor protocols and timing. Configuring ESC firmware for specific motors and props. This skill level emerges after completing dozens of simpler repairs.
Custom modifications like adding components or upgrading systems requires comprehensive understanding of how systems integrate. Adding GPS, upgrading video system, or installing new receiver all require planning, proper integration, and testing. These projects combine mechanical, electrical, and software skills developed through earlier repairs.
When Repair Doesn't Make Sense
Cost-Benefit Analysis
Sometimes throwing money at broken drone doesn't make economic sense.
Calculate accumulated repair costs versus replacement cost. If you've replaced motor, ESC, two arms, and FC on $400 drone, you've spent $250-300 in parts plus substantial time. At this point buying new $400 drone provides fresh start with warranty rather than continuing repair cascade.
Consider opportunity cost of repair time. Spending ten hours troubleshooting intermittent electrical problem costs more than monetary parts in lost flying time. Complex problems that resist diagnosis sometimes better solved through replacement rather than endless investigation.
Evaluate technological obsolescence. Repairing five-year-old drone with obsolete flight controller and discontinued parts makes less sense than upgrading to modern equipment with better performance and support.
Signs It's Time to Rebuild
Multiple concurrent failures indicate systemic problem rather than isolated component failure.
Frame damage affecting multiple arms or body structure means structural integrity compromised. Cracks propagate through carbon fiber. Fixing one crack while others develop creates endless repair cycle. Fresh frame solves structural problems permanently.
Electrical problems affecting multiple systems simultaneously suggest power supply issues, wiring damage, or component incompatibility. Tracking down root cause in rats nest of wiring is frustrating. Clean rebuild with proper wiring from start eliminates accumulated issues.
Water damage requiring component replacement throughout aircraft makes rebuild sensible. Corrosion spreads invisibly. Components that seem fine now may fail weeks later from moisture damage. Fresh start eliminates uncertainty.
Accumulation of minor issues that individually aren't replacement-worthy but collectively impair performance. Slightly bent arms, marginally worn motors, questionable solder joints, minor frame cracks—each fixable but together suggesting airframe has reached end of service life. Rebuild provides fresh start with zero accumulated wear.
Salvaging Components from Dead Drone
Even dead drone has value in salvageable components.
Motors that still work transfer to new build saving $80-160. Test thoroughly before installation ensuring bearings still smooth. Clean and inspect carefully. Working motors often outlast frames when properly maintained.
Flight controller and ESC if undamaged provide backup components or transfer to new build. Flash fresh firmware and verify full functionality. Electronics that survived failure causing rebuild often continue working reliably in new application.
Video system including camera, VTX, and antennas typically survive crashes that destroy airframe. These components represent $100-200 investment worth salvaging. Test video system carefully ensuring no intermittent issues before trusting in new build.
Receiver, GPS, and accessories rarely damaged in crashes affecting frame. Transfer these directly to rebuild. Update configuration as needed for new frame geometry or layout.
Frame components like hardware, standoffs, and screws have reuse value. Sort and organize salvaged hardware. Quality stainless steel screws and aluminum standoffs last indefinitely.
Essential Tools and Their Uses
Basic Tool Kit
Every FPV pilot needs basic tools handling ninety percent of maintenance and repair. For complete starter solutions, consider the Flywoo FPV Tool Kit or NewBeeDrone Tool Kit which bundle essentials in portable cases.
Soldering iron is non-negotiable tool for anything beyond prop replacement. Choose temperature-controlled iron with fine tip suitable for small electronics. Budget $40-60 for quality soldering station. Cheap $15 irons work but temperature control and tip quality significantly affect joint quality and ease of use. See our setup cost guide for specific recommendations.
Solder and flux work together creating reliable joints. Use 60/40 or 63/37 rosin-core solder like Lumenier 63/37 Solder Wire in 0.8mm or 1mm diameter for most FPV applications. Thinner solder gives more control for small components. Flux paste or liquid helps solder flow and creates stronger joints. Budget $15-20 for quality solder and flux that lasts hundreds of joints.
Screwdriver set needs multiple sizes of hex drivers and Phillips head. Most FPV drones use metric hex screws in 1.5mm, 2mm, and 2.5mm sizes. Tools like the TBS Ethix Multi-Purpose Prop Tool combine prop wrench with hex drivers. Quality hex drivers prevent screw head stripping. Budget $15-25 for good set. Cheap drivers round screw heads costing more in damaged hardware than tool savings.
Wire cutters and strippers prepare wires for soldering. Flush-cut cutters trim wires cleanly without leaving sharp ends. Wire strippers remove insulation without damaging conductor. Budget $15-20 for both tools. Good cutters last decades while cheap ones dull quickly.
Multimeter tests voltage, continuity, and resistance. Essential for electrical troubleshooting. Budget $20-40 for multimeter with basic functions. Features needed include DC voltage measurement, continuity testing, and resistance measurement. Auto-ranging simplifies use.
Intermediate Tools
Additional tools handle specialized tasks becoming necessary as repair skills develop.
Desoldering pump or braid removes old solder when replacing components. Pump sucks molten solder away from joint. Braid wicks solder through capillary action. Both work but braid is generally easier for beginners. Budget $5-10.
Helping hands hold components steady during soldering. Spring-loaded clips or magnetic base positions PCBs at convenient angle. The Lumenier Helping Hands features flexible arms, LED light, and magnifier. Frees both hands for iron and solder. Budget $10-20 for basic helping hands or $30-50 for better designs with flexible arms.
Microscope or magnifying glass helps inspect small components and solder joints. USB microscope or desk-mounted magnifier reveals detail invisible to naked eye. Useful for checking joint quality and finding hairline cracks. Budget $20-60 depending on features.
Heat shrink tubing insulates and protects solder joints. Various sizes needed for different wire gauges. Heat gun shrinks tubing. Budget $10 for assortment of heat shrink and basic heat gun, or use lighter carefully as cheaper alternative.
Prop balancer identifies unbalanced props causing vibration. Simple tool—shaft with props balanced on bearings. Unbalanced prop rotates to heavy side. Budget $10-15 for magnetic or bearing-style balancer.
Advanced Tools
Professional-level tools support complex repairs and building from scratch.
Hot air rework station removes surface-mount components without destroying them. Hot air melts solder allowing component removal. Useful for flight controller and ESC repair. Budget $80-150 for quality station. Most pilots don't need this—soldering iron handles ninety-five percent of repairs.
Oscilloscope diagnoses electrical problems analyzing signal quality. Overkill for most repairs but invaluable for debugging mysterious electrical issues. Budget $200+ for basic scope or use PC-based scope for $50-100.
3D printer creates custom parts like camera mounts, battery holders, or one-off brackets. Opens creative possibilities for custom builds and repairs. Budget $200-500 for beginner 3D printer suitable for printing small drone parts.
Smoke stopper protects electronics during first power-up after repairs. Inline fuse or current limiter prevents catastrophic failure if wiring is incorrect. Budget $30-60 for commercial smoke stopper or build DIY version with automotive fuse and connector.
Spare Parts Inventory Strategy
Essential Spares
Keep critical spares on hand preventing "grounded" situations waiting for shipping.
Props are obvious spare—keep minimum twenty sets (eighty props total) for active flying. Different flying styles consume props at different rates. Racers might use five sets per session. Freestyle pilots might use two sets. Adjust inventory to your crash rate. Budget $60-100 for prop inventory. Browse FPV props at GetFPV for your specific size and pitch.
Motors as spares prevent being grounded by motor failure. Keep two motors matching your build. Motors occasionally fail unpredictably. Having spares means fifteen-minute motor replacement versus three-day wait for shipping. Budget $50-100 for two spare motors.
Frame arms for your specific frame prevent structural failures ending session. Arms crack at mounting points. Keep two spare arms at minimum. Arm replacement takes twenty minutes versus waiting days for replacements. Budget $40-80 for spare arms.
Battery connectors wear out from repeated connection cycles. Keep five spare XT60 or XT30 connectors (whatever your drone uses). Connector replacement prevents battery connection problems. Budget $10-20 for connector inventory.
Nice-to-Have Spares
Additional spares enhance convenience without being critical.
ESC as spare helps recover from ESC failure though less critical than motor spares since ESC failure is less common. Keep one spare 4-in-1 ESC or individual ESCs matching your configuration. Budget $40-80 for ESC spare.
Flight controller spare prevents complete grounding if FC fails catastrophically. Modern FCs are reliable but failures do occur. Having spare pre-configured FC means swapping and flying versus reconfiguring new FC. Budget $40-80 for FC spare.
Camera spare useful if your camera fails though cameras fail less frequently than mechanical components. Video system failure prevents flying FPV. Spare camera means quick replacement. Budget $30-60 for camera spare.
VTX spare prevents video system failures grounding you. VTXs occasionally fail from overheating or electrical issues. Having spare means continuing to fly. Budget $40-60 for VTX spare.
Parts Not Worth Stocking
Some components don't justify keeping as spares.
Receivers rarely fail and are inexpensive enough to express-ship if needed. Unless you're traveling to remote location for extended flying, receiver spare isn't necessary.
Batteries as spares don't work well—batteries degrade in storage. Buy batteries in quantity you'll use regularly rather than keeping unused spares. Better to have six batteries you rotate than four actively used and two "spares" degrading unused.
Specialty parts like GPS modules, OSD chips, or specific cameras are too specialized and rarely needed. Buy these when needed rather than maintaining inventory.
Long-Term Drone Health
Cumulative Wear Patterns
Understanding how wear accumulates helps you plan maintenance and replacements.
Vibration causes most cumulative damage. Each flight at high RPM with imperfect balance works solder joints loose, propagates frame cracks, and wears bearings. Pilots who maintain balanced props and smooth motors dramatically extend component life versus pilots who ignore vibration.
Thermal cycling from repeated heat/cool cycles cracks solder joints. Every flight heats components. Cooling between flights creates expansion/contraction. After hundreds of cycles, solder joints develop work-hardening cracks. Regular solder joint inspection catches these before failure.
UV exposure degrades carbon fiber over time. Sunlight breaks down resin matrix in carbon fiber. Indoor storage between flights and minimal direct sun exposure extends frame life. Frames kept outdoor degrade faster.
Moisture exposure corrodes electronics and motors. Flying in morning dew or after rain introduces moisture. Proper drying and storage prevents corrosion. Periodic cleaning with isopropyl alcohol removes moisture-trapping contamination.
Flight Hour Tracking
Tracking flight time helps schedule preventative maintenance appropriately.
Log flight time either manually or using flight controller recording. Most modern flight controllers track total flight time. Review periodically noting when maintenance is due.
Schedule maintenance by flight hours rather than calendar time. Motor bearing inspection every twenty hours. Solder joint inspection every fifty hours. Deep clean every one hundred hours. This ensures maintenance aligned with actual wear versus arbitrary calendar schedule.
Component replacement timing based on flight hours rather than age. Motors need replacement at 100-200 hours depending on quality and use. Batteries degrade based on cycles rather than age. Flight hour tracking enables proactive replacement before failure.
Conclusion
Successful FPV flying requires accepting breakage as routine and developing systematic approach to maintenance and repair. Preventative maintenance catches problems before they cause crashes. Regular inspection during pre-flight, post-flight, and monthly sessions identifies developing issues. When failures occur, systematic troubleshooting isolates problems efficiently.
Basic repairs including prop replacement, motor swaps, and solder joint fixes keep you flying without expensive professional service. Building these skills gradually through practice transforms repairs from intimidating tasks into routine procedures taking minutes rather than hours.
Understanding when repair stops making economic sense prevents throwing money at terminal aircraft. Multiple failures, accumulated wear, or technological obsolescence all indicate rebuild makes more sense than continued repair.
The time invested in learning maintenance and repair skills pays dividends throughout your FPV flying. The pilot who can diagnose problems quickly and fix them competently flies more and spends less than pilot dependent on others for every issue. These skills develop gradually—nobody starts as expert. Your first motor replacement will be stressful and slow. Your twentieth will be routine. Building skills through deliberate practice transforms you from helpless when things break into confident repairer who views problems as solvable rather than catastrophic.
For component recommendations when replacing parts, see our racing drones guide, and setup cost guide. For learning to build from scratch which develops deep understanding of maintenance, see our build guide.
FAQ - FPV Drone Maintenance and Repair
Q: How often should I perform maintenance on my FPV drone?
Perform quick pre-flight inspection before every flight (5 minutes checking frame, props, battery, motors). Do post-flight inspection after every session checking for damage and allowing batteries to cool. Monthly maintenance every 5-10 flights includes motor bearing check, solder joint inspection, and prop balancing (30-60 minutes). Deep maintenance every 3-6 months involves complete disassembly, cleaning, and component replacement (2-3 hours). Adjust frequency based on flying style—aggressive racing requires more frequent maintenance than casual freestyle. Tracking flight hours helps schedule maintenance appropriately rather than arbitrary calendar intervals.
Q: What tools do I need for basic FPV drone repairs?
Essential tools include temperature-controlled soldering iron ($40-60), solder and flux ($15-20), hex driver set in 1.5mm, 2mm, 2.5mm sizes ($15-25), wire cutters and strippers ($15-20), and multimeter ($20-40). Total basic toolkit costs $100-150. Add desoldering pump or braid ($5-10), helping hands ($10-20), and prop balancer ($10-15) for intermediate repairs. Quality tools prevent damage—cheap screwdrivers strip screw heads, poor soldering irons create cold joints. Complete tool kits like the Flywoo or NewBeeDrone bundles provide everything needed. See our setup cost guide for specific tool recommendations.
Q: How do I know when to replace a motor versus repairing it?
Replace motor when bearings feel rough, grinding, or clicking when spinning by hand. Bearings don't improve once degraded. Bearing replacement is possible but costs almost as much as new motor while being more complex. Replace motor if it won't spin freely, overheats during flight (too hot to touch after landing), or shows visible damage to bell or stator. Motors last 50-200 flight hours depending on quality and use. Budget motors ($15-25) warrant replacement over repair. Premium motors ($40-50) may justify bearing replacement if you have skills and tools. For most pilots, motor replacement ($20-50) is simpler than repair.
Q: What spare parts should I keep in stock?
Essential spares include props (20 sets minimum, $60-100), two spare motors matching your build ($50-100), two frame arms for your specific frame ($40-80), and battery connectors ($10-20). These prevent being grounded by common failures. Nice-to-have spares include spare 4-in-1 ESC ($40-80), flight controller ($40-80), camera ($30-60), and VTX ($40-60). Total essential spares budget is $150-300. Adjust based on flying frequency and crash rate. Don't stock receivers (rarely fail), batteries (degrade in storage), or specialty parts (too specialized). Buy frequently-broken parts, not rare-to-fail expensive components.
Q: How can I tell if a solder joint is bad?
Bad solder joints appear dull and grainy rather than shiny and smooth. Cold joints look rough with visible gaps between solder and component lead or pad. Cracked joints show visible separation lines. Good joints are smooth, shiny, and completely cover the connection with small fillet shape. Test suspect joints by gently wiggling component—any movement indicates bad joint. Check electrical continuity with multimeter—bad joints show high resistance or intermittent connection. Joints in high-vibration areas (motor wires, battery connectors) fail most often. Regular inspection with magnification reveals developing problems before causing failures.
Q: When should I rebuild my drone versus continuing repairs?
Rebuild when accumulated repair costs approach 50-75% of new drone cost. If you've replaced multiple motors, ESC, flight controller, and arms on $400 drone spending $250-300, fresh start makes more sense. Rebuild when frame has multiple cracks affecting structural integrity. Rebuild after water damage requiring widespread component replacement—corrosion spreads invisibly. Rebuild when experiencing multiple simultaneous electrical problems indicating systemic wiring issues. Rebuild for technological upgrade—modern flight controllers and ESCs significantly outperform five-year-old equipment. Salvage working components (motors, video system, receiver) to reduce rebuild cost.
Q: How do I troubleshoot a drone that won't arm?
Check battery voltage first—low voltage prevents arming. Verify transmitter connection checking signal strength in configurator. Review flight mode configuration ensuring arm switch is properly assigned and functioning. Check accelerometer calibration—recalibrate if needed. Examine arming prevention flags in flight controller showing exact reason—Betaflight displays flags like "RXLOSS" (no receiver signal), "ANGLE" (drone tilted excessively), or "RPMFILTER" (RPM filtering not working). Address specific flag shown. Verify hardware including receiver connection, flight controller mounting, and component integrity. Systematic checklist identifies problem faster than random troubleshooting.
Q: What causes excessive vibration in FPV drones?
Vibration comes from unbalanced props (most common cause), failing motor bearings (grinding or rough feel when spun), loose motor mounting screws (check and tighten with threadlocker), cracked frame arms (causes flexing during flight), or improperly soft-mounted flight controller (should use rubber grommets isolating from frame vibration). Balance props using prop balancer tool—unbalanced props rotate to heavy side. Replace props that can't be balanced. Test motor bearings by spinning each motor by hand—rough bearings require motor replacement. Check all motor screws for tightness. Inspect frame for cracks especially at arm bases. Proper soft-mounting reduces vibration reaching flight controller gyroscope.
Q: How long do FPV drone components typically last?
Props last 1-30 flights depending on crashes ($3-5 per set). Motors last 50-200 flight hours before bearing failure ($20-50 replacement). ESCs last 100+ hours if not overheated ($15-40 individually, $40-80 for 4-in-1). Flight controllers last years if not crashed ($40-80). Frames last indefinitely until crashed or cracked ($40-150). Batteries degrade over 100-300 charge cycles depending on care ($25-50 per 4S-6S battery). Video system components (camera, VTX) last years unless damaged ($60-140 for camera+VTX). These are averages—quality components and gentle flying extends life, while aggressive flying and poor maintenance reduces lifespan significantly.
Q: Can I fly with a small crack in my frame arm?
No. Small cracks propagate under stress and will fail catastrophically mid-flight. Carbon fiber cracks don't heal or stabilize—they only worsen. Even tiny crack at arm base will spread causing arm separation during flight resulting in crash and potential additional damage. Replace cracked arm immediately ($15-30 for single arm). Mark crack with marker and continue using that motor position on ground for testing if you must, but never fly with cracked arm under load. Frame arm replacement is straightforward repair taking 20-30 minutes. Cost and time of replacement far less than cost of crash from arm failure.
Q: How do I prevent water damage to my FPV drone?
Avoid flying in rain, through puddles, or in heavy morning dew. If drone gets wet, immediately power off and remove battery preventing shorts. Disassemble major components allowing air circulation. Blow out water with compressed air focusing on motors and electronics. Clean with 90%+ isopropyl alcohol displacing water and removing contaminants. Allow 24-48 hours drying time before powering on—rushing causes shorts. Store drone indoors in dry environment. Consider conformal coating on electronics for water resistance if flying near water frequently, though this makes future repairs harder. If drone gets soaked, expect corrosion developing even after cleaning—monitor for failures in following weeks.
Q: What's the best way to learn soldering for drone repairs?
Start with practice board or scrap electronics before working on expensive drone components. Learn on low-stakes joints that can be redone. Use temperature-controlled soldering iron at 350-380°C (660-715°F) for lead solder. Keep tip clean and tinned. Add flux to improve solder flow. Heat both pad and component lead simultaneously then add solder. Solder should flow smoothly creating shiny joint. Remove iron and let cool without movement. Practice makes perfect—first joints will be ugly, twentieth will look professional. Watch YouTube tutorials showing proper technique. Common mistakes include too-hot iron (burns components), insufficient heat (cold joints), no flux (poor flow), and moving during cooling (weak joints).
Q: How much should I budget for annual maintenance and repairs?
Expect $200-500 annual maintenance and repair costs for moderate flying frequency (50-100 flights yearly). This includes props ($80-150 for 20-40 sets consumed during year), 2-4 motor replacements ($60-120), 1-2 arm replacements ($30-60), battery replacements ($50-100 for 1-2 batteries), solder and consumables ($20-40), and miscellaneous parts ($40-80). Aggressive racing increases costs to $400-800 annually. Gentle freestyle flying reduces costs to $150-300 annually. First year costs are higher establishing spare parts inventory ($150-300) and buying tools ($100-150). Budget increases during learning period due to higher crash rate.
Q: Should I repair my own drone or pay someone else?
Learn basic repairs yourself—prop replacement, motor swaps, and simple soldering save substantial money long-term. Professional repairs cost $50-100/hour labor plus parts. Motor replacement costs $80-150 professionally versus $30-50 DIY (parts only). Simple repairs like these pay for tool investment after 2-3 repairs. Consider professional help for complex electrical troubleshooting, flight controller programming issues, or if you lack tools/skills. Building repair skills gradually through practice transforms you from dependent on others to self-sufficient. Start with simple repairs, graduate to complex as confidence grows. Most pilots who stick with hobby for 1+ years develop basic repair skills from necessity.
Q: How do I diagnose which motor is failing?
Spin each motor by hand without power connected. Failing motor shows grinding, clicking, resistance, or won't spin freely. Healthy motors spin smoothly for several seconds before friction stops rotation. Compare feel between motors—failing motor feels noticeably different. Listen for noise—healthy motors are nearly silent while bad bearings click, grind, or make rough sounds. Check for heat after flight—overheating motor indicates bearing failure or electrical problem. Use configurator motor test at low throttle watching for vibration or irregular behavior. Swap motor to different ESC output determining if problem follows motor (motor failure) or stays with position (ESC failure). Systematic testing identifies problem motor accurately.
Q: What should I do immediately after crashing?
Disarm and disconnect battery immediately preventing further damage if components are shorted. Inspect for visible damage including cracked frame, bent props, loose components, or damaged wiring. Check that motors spin freely—bent shaft prevents rotation indicating motor damage. Look for smoke or burning smell indicating electrical damage. Let drone cool if hot—thermal stress affects troubleshooting accuracy. Test basic systems before next flight: power on checking video feed, arm checking motors respond, do brief hover verifying control. Don't continue flying with suspected damage—crashes cascade when compromised components fail mid-flight. Better to ground drone for inspection than risk additional damage from flying wounded aircraft.
