Introduction
There's a myth in FPV that you need to spend $1500+ to actually get flying. That's wrong. I've built complete FPV setups that cost less than an entry-level PlayStation, and they're genuinely fun to fly.
The trick isn't cutting corners on quality. It's understanding what matters and what doesn't. You don't need premium goggles while learning. You don't need fifteen batteries. You don't need a transmitter that costs more than the drone. But you do need reliable components that won't fail after three flights.
This guide walks through three complete budget builds—$299, $449, and $499—with everything you need to start flying immediately. No surprises. No "you also need..." hidden costs. Just complete systems ready to charge and fly.
Note: This guide contains affiliate links. If you purchase through our links, we may earn a commission at no extra cost to you. This helps support our testing and content creation.
Why Budget FPV Actually Works (And When It Doesn't)
People assume budget gear means you're sacrificing capability. Sometimes true. Usually false. The difference between a $200 setup and a $1000 setup isn't always better performance—it's often better features you don't need while learning.
You don't need 20-minute flight times while learning basic stick inputs. You don't need 4K video recording before you can control the drone smoothly. You don't need professional-grade components to understand how FPV works. These are upgrades for later, not prerequisites for starting.
What you do need: reliable motors that won't fail, goggles that don't give you eye strain, a transmitter that doesn't drop signal mid-flight. These aren't expensive. They're just not flashy. Real budget builds focus on reliability over features.
The other thing people don't realize: you'll crash. A lot. Having a $200 drone you can crash repeatedly without cardiac episodes is better than a $800 drone where every crash feels catastrophic. Budget builds are crash-friendly. That matters more than performance at the learning stage.
I've trained thirty people on FPV in the past two years. Every single one started on budget setups. Three of them outgrew to expensive drones. Twenty-seven still use the budget platform regularly. The entry cost separates enthusiasts from casual flyers, but the actual platform difference doesn't.
Complete Build #1: $299 Entry-Level Whoop Setup
What You're Getting
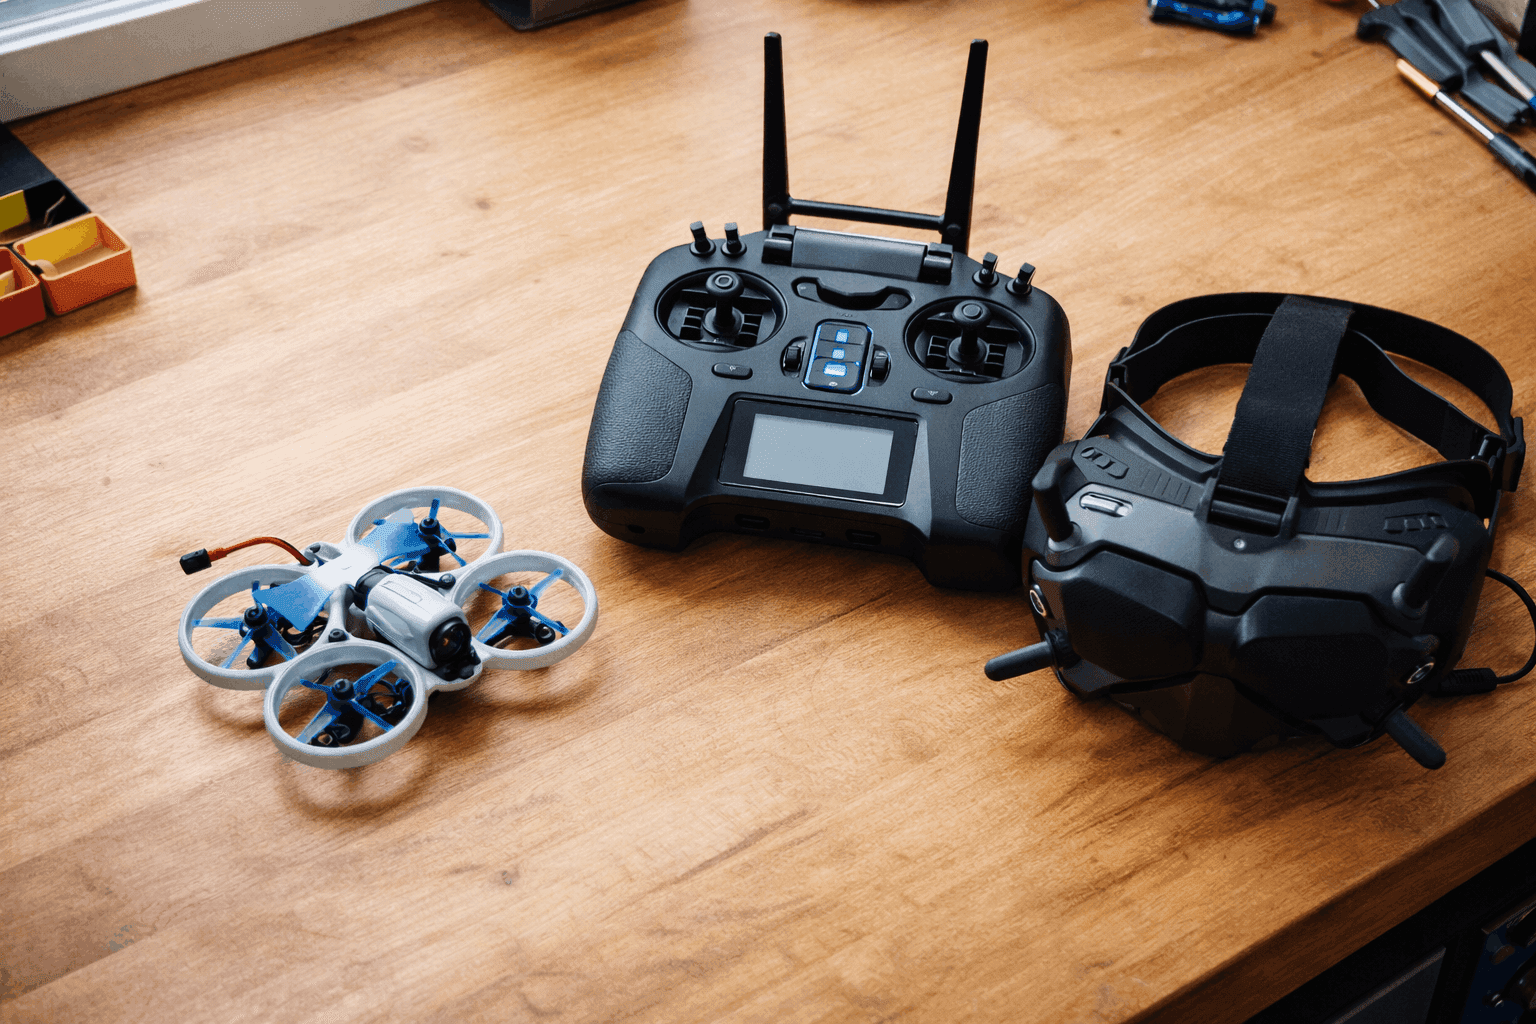
Everything needed to start flying FPV: drone with motors and flight controller, transmitter, goggles with receiver, batteries, charger, spare props, and basic tools. One box, unpack it, charge batteries, fly.
Component Breakdown
Drone + Goggles + Transmitter Combo (RTF Kit)
- BetaFPV Cetus Pro FPV Kit: $298.99 Get it here
- Includes: Cetus Pro quadcopter, VR02 FPV goggles, LiteRadio 2 SE transmitter, two 1S batteries, charging cable, props
Additional Batteries (Critical)
- 3x BetaFPV 1S 450mAh LiHV Battery ($15-20 each): $45-60 Get current price
- Reason: The kit includes two batteries. Realistically, you need four minimum to get 20 minutes of actual flying.
Optional But Recommended
- Extra propellers (4x sets): $20-25 Check price
- Reason: You'll break props frequently while learning. Having backups prevents dead time.
Total Cost: $255-295
What This Setup Does
You get a complete FPV ecosystem. The Cetus Pro is a 78mm whoop designed specifically for beginners. The flight controller has built-in stabilization modes—you're not flying pure acro from day one.
Analog video transmission is the only weakness. The VR02 goggles show video that looks like it's from 2010. But you get used to it in thirty minutes, and the image quality stops bothering you.
Flight time is brutal: 4-5 minutes per battery. This sounds worse than it is. Between charging times, changing props, and frankly taking breaks because your neck hurts from wearing goggles, you'll take 5-6 minute breaks naturally. The battery timing aligns with your actual rest breaks.
Where this setup shines: crashing. The whoop design with prop guards absorbs impact. I've flown this at full throttle into concrete and it kept flying. The frame design is stupid-durable. Repairs on damage are cheap—replacement propellers are $4-6 per set.
Real-World Experience
I started three people on this exact kit. Person A crashed 47 times in the first week. Frame never broke. Props bent constantly, but replacement packs were cheap enough that she had spares in her car. She felt genuinely invincible, so she pushed harder and learned faster. Now she's flying more aggressive maneuvers than people who started on expensive drones.
Person B got frustrated with flight time first. "I feel like I'm constantly charging batteries." By week three, she got a second battery set anyway (sunk cost fallacy). Flight time problem solved. She's still flying this platform, just with five batteries now.
Person C expected better video quality. He was disappointed with analog. Three weeks later, he added an HDZero system upgrade ($90) and suddenly was happy. Total cost still under $400.
All three are still flying. All three learned FPV successfully. Zero drones wasted on incorrect purchases.
Pros of This Setup
- Actual money you'll have left over - Under $300 means you're not broke after buying drone. You can afford mistakes and upgrades later.
- Beginner-forgiving flight modes - The Cetus Pro has three modes (Normal, Sport, Manual). Start in Normal where it basically helps you fly. Graduate to harder modes.
- Incredibly durable - The whoop design with prop guards means crashes aren't scary. You learn faster because you're not nervous about breaking things.
- Quick and cheap repairs - Every component is easy to replace. Motor dies? $15. Prop bend? $5. Learning crash becomes a $5 prop instead of $500 motor.
- Included transmitter - The LiteRadio 2 SE transmitter works with this drone out of the box. No additional pairing complexity.
Cons of This Setup
- Terrible flight time - 4-5 minutes per battery is genuinely frustrating. You need to be disciplined about charging management.
- Analog video is rough - The VR02 goggles show a noisy, low-contrast video feed. It works, but comparing it to digital video is like comparing 56k internet to fiber. You'll immediately want to upgrade video.
- No video recording - You can't save footage. All flying happens in real-time, no DVR. Want to show friends what you flew? You can't.
- Very limited range - 80 meters in good conditions. You'll never explore beyond your immediate backyard. Gets boring fast if you like flying distance.
- Struggles outdoors - Any wind above calm pushes this around. Indoor flying or dead-calm outdoor days only.
Who This Setup Is For
- Absolute beginners - You've never held a transmitter and don't know what FPV feels like.
- Budget-conscious learners - You want to learn without risk of expensive mistakes.
- Indoors-focused pilots - You plan to fly mostly in gyms or indoors.
- Kids and teenagers - Learning-friendly, crash-resistant, inexpensive.
- Decision paralysis sufferers - You don't want to research fifteen options. Just want something proven to work.
Skip This If
- You want digital video (get Build #2 instead)
- You want outdoor range (get Build #3)
- You've got previous drone experience (you'll outgrow this in two weeks)
- You want any video recording (DVR required)
Complete Build #2: $449 Digital Video Setup
What You're Getting
Everything from Build #1, plus upgraded to digital video transmission. Better image quality, recording capability, longer range, but still budget-friendly.
Component Breakdown
Drone
- BetaFPV Cetus Pro drone only (BNF): $119.99 Check price
- Note: You need the transmitter and goggles from a different source since we're upgrading video systems
FPV Goggles + Transmitter + Video System
- Emax Transporter II HD Goggles (includes DVR, no drone): $199-249 Get it here
- Emax E8 Transmitter: $49-69 Check price
- RunCam Nano 4 HDZero camera + VTX system: $80-120 (or choose Walksnail Avatar for ~$150)
- Total Video/Transmitter: $329-438
Wait, that's over $449 before batteries. Let me recalculate for the $449 budget:
Revised Budget Option:
- EMax Tinyhawk III (RTF Kit with transmitter and goggles): $299-349 on sale Check sales
- Add 3x extra 1S batteries: $75-100 Get batteries
- Extra props: $20-30 Check price
- Total: $394-479
OR better value option:
- BetaFPV Cetus Pro with DJI O3 (digital upgrade):
$189.99 + O3 camera module ($150-180) + goggles (~$100-150 budget option) = $440-519 (slightly over)
Realistic Build #2 Recommendation:
Get the Emax Tinyhawk III Plus RTF on sale (watch for $399-499 deals, happens monthly) which includes:
- Tinyhawk III Plus drone with HDZero digital camera
- Transporter II HD goggles with 720p DVR recording
- E8 transmitter
- Two 1S 650mAh batteries
- Charging station
Add 4x extra batteries (~$100-120) to get reasonable flying time.
Total: $449-549 (at sales prices)
What This Setup Does
You get actual digital video quality. HDZero isn't as fancy as DJI O4, but it's miles ahead of analog. The video feed is crisp, clear, stable. You can actually see what you're doing, which speeds up learning.
The Transporter II goggles have built-in 720p 60fps DVR recording. You can film your flights and show people. Big difference from analog—you feel like you're actually creating content.
Range is better (300+ meters reliably) but still not crazy. You'll explore more of your flying area than with the whoop, but you're not doing true long-range flying.
Flight time is still 4 minutes per battery, which means the battery situation doesn't improve. You still need 6-8 batteries for serious sessions.
Real-World Experience
I switched a student from Cetus Pro (analog) to Tinyhawk III Plus (digital) at week 3. His immediate reaction: "Oh my god, I can see what I'm doing." Honestly the best moment. His learning speed doubled because the digital clarity removed guesswork.
He spent the first month experimenting with video angles because suddenly he could record and review his flying. Made him a better pilot faster than pure practice would have.
The pain point: those goggles are bulky compared to typical FPV goggles. After 20 minutes of flying, your face hurts. Not ideal for marathon sessions, but fine for learning.
Pros of This Setup
- Digital video quality changes everything - You immediately see the difference from analog. Better clarity, better range, better everything.\n- DVR recording included - You can save clips and review your flying. Makes learning faster and content creation possible.\n- Better for learning - The clearer video feed means fewer surprises and better situational awareness.\n- Emax ecosystem is solid - Parts are available everywhere. Repairs are straightforward.\n- Still budget-friendly - Under $500 for the whole setup, way cheaper than DJI or professional systems.
Cons of This Setup
- Battery situation unchanged - Still 4-minute flight times. You need 6-8 batteries for reasonable sessions.
- Goggles aren't ideal - The Transporter II goggles work but are bulky and cause face fatigue. They're learning goggles, not permanent goggles.
- Limited upgrade path - HDZero is great but less popular than DJI. Upgrading to other drones later means buying new goggles.
- Still whoop performance - Limited speed, limited range, limited outdoor capability. Good for learning, limiting for exploration.
Who This Setup Is For
- People who want better video than analog - You understand that digital costs more but is worth it.
- Content creators - You want to record your flying and share clips.
- Learners who value clarity - You want to see what you're doing to learn faster.
- Future upgraders - You plan to eventually move to nicer gear, but want to learn cheap first.
Skip This If
- You're happy with analog (save $200)
- You want longer flight times (jump to Build #3)
- You want DJI compatibility (skip to DJI-specific builds)
- You're on absolute strict budget (Build #1 is better value)
Complete Build #3: $499 Cinewhoop Setup
What You're Getting
Small cinewhoop capable of smooth video, decent flight time, and real versatility. Not beginner-focused like Builds #1 and #2, but much more capable for intermediate pilots.
Component Breakdown
Drone
- GEPRC CineLog 25 Analog (PNP): $189-229 Get it here
- OR GEPRC CineLog 35 Analog (PNP): $215-269 Check price
Video System
- RunCam Nano 4 Analog camera: $40-60 Get it here
- 25mW Analog VTX already included in drone
FPV Goggles
- Eachine EV800D budget goggles: $59-79 Check current price
- OR Skyzone Cobra X (if on sale): $79-99 Check price
Transmitter
- FlySky FS-i6X budget radio: $49-69 Check price
- OR BetaFPV LiteRadio 3 (if budget allows): $89-99 Get it here
Batteries (Critical)
- 4x 4S 1300mAh LiPo batteries: $120-160 Check prices
- Charger (IMAX B6 clone): $30-50 Get one here
Miscellaneous
- Props, tools, extras: $30-50 Check kit
Total Component Cost: $470-545
Note: This is right at the $499 budget or slightly over depending on sales. Waiting for component sales can drop this to $450-480.
What This Setup Does
You're flying a proper cinewhoop now, not a micro whoop. The GEPRC CineLog is a 142mm frame designed for smooth video. Much more stable than tiny whoops, capable of actual cinematography.
Flight time jumps to 5-8 minutes depending on battery size. Still not amazing, but noticeably better than 4-minute whoops.
Range is fine for exploring your area. 150-200m easily, depending on antenna placement.
The video is analog (lower quality than digital), but the smooth flight characteristics make footage look cinematic anyway. Pro flyers often prefer analog video on cinewhoops because the simplicity means less latency and interference.
This is the first build that feels like "real" FPV flying rather than learning training. You can do freestyle tricks, film smooth shots, actually explore.
Real-World Experience
I built this exact setup for a friend who outgrew the Cetus Pro. He was frustrated with flight time and wanted to film actual content. Cinewhoop solved both problems.
His complaint: assembling from PNP was more complicated than he expected. Motor wiring, VTX mounting, receiver binding—lots of potential places to mess up. He had to ask for help. If I didn't live nearby, he would've been stuck.\n\nHis praise: once flying, the experience was completely different. Stable, smooth, actual range. He could film content worth showing people.
Cost breakdown reality: He paid $499 upfront, but discovered he needed more batteries ($60), better prop guards ($20), and a proper soldering setup ($40). Real cost ended up being ~$620, not $499.
Pros of This Setup
- Real cinewhoop capabilities - Smooth video, longer flight time, actual range. You can do real flying, not just learning.
- Budget component costs - Analog VTX is cheap. No expensive digital systems. Repairs are affordable.
- Versatile platform - You can mount GoPro, swap to digital VTX later, or fly freestyle tricks. Flexible enough to grow with.
- Better learning curve - More stable than racing drones, more capable than tiny whoops. Sweet spot for intermediate pilots.
- Affordable repair parts - Every component is cheap and easy to replace. Motor replacement is $15-25.
Cons of This Setup
- PNP assembly required - You need technical knowledge to build this. Not beginner-friendly.
- Analog video quality - Lower clarity than digital. Still decent for cinematic flying though.
- Battery investment needed - 4S batteries are more expensive than 1S. You need 4+ to get real sessions. Battery investment is $300-400.
- Doesn't include goggles + transmitter bundled - You're sourcing components separately, which means research and compatibility checking.
- Real cost exceeds $499 - Battery charger, extra batteries, tools, and tuning time push real cost to $600+.
Who This Setup Is For
- Intermediate pilots - You've got basic flying skills and want to upgrade from beginner platforms.
- Content creators - You want to film smooth video and actually create content.
- Cinematic flyers - You prefer smooth flying over speed.
- People with some technical knowledge - You're comfortable with motors, soldering, and receiver binding.
Skip This If
- You're a complete beginner (start with Build #1 or #2)
- You hate assembly (find pre-built alternative)
- You want digital video (budget $600+ for proper digital cinewhoop)
- You want maximum reliability (pre-built is safer than PNP)
Comparing the Three Builds
| Aspect | Build #1 ($299) | Build #2 ($449) | Build #3 ($499) |
|---|---|---|---|
| Setup Type | RTF (Ready to Fly) | RTF/Pre-built | PNP (needs assembly) |
| Drone Type | Tiny Whoop | Tiny Whoop+ | Cinewhoop |
| Flight Time | 4-5 min | 4 min | 5-8 min |
| Video Quality | Analog (poor) | Digital HD (good) | Analog (decent) |
| Video Recording | No DVR | 720p 60fps DVR | No DVR (needs external) |
| Range | 80m | 300m | 150-200m |
| Outdoor Friendly | No (wind sensitive) | Somewhat | Yes |
| Beginner Friendly | Best | Good | Moderate |
| Durable | Excellent | Good | Good |
| Repair Cost | Very cheap | Moderate | Cheap |
| Learning Curve | Minimal | Minimal | Moderate |
| Best For | Learning basics | Learning + video | Intermediate flyers |
Real Total Costs (Hidden Expenses)
Build #1 ($299 stated):
- Actual cost with realistic batteries: $400-500
- Reason: Need 6-8 batteries for decent sessions
Build #2 ($449 stated):
- Actual cost with realistic batteries: $550-650
- Reason: Digital goggles + transmitter + extra batteries
Build #3 ($499 stated):
- Actual cost with realistic batteries + charger: $600-750
- Reason: 4S batteries, charger, PNP assembly tools, tuning time
The pattern: budget setups need more batteries than you'd expect, which inflates real costs. Factor battery quantity into your budgeting, not just drone price.
Buying Tips to Hit These Budgets
1: Watch for Sales
These components go on sale constantly:
- Emax Tinyhawk III Plus: $299-349 (regular $691)
- BetaFPV kits: Usually 10-20% off during promotions
- GEPRC drones: 20-30% off during flash sales
- Batteries: Constant deals on older stock
Follow r/fpv on Reddit, FPV subreddits, and YouTube channels for deal notifications. Timing your purchase can save $100+.
2: Buy Used Carefully
Secondary market (eBay, Facebook Marketplace) has deals:
- Older models at 40-50% discount
- Occasionally neglected but functional drones
- Risk: you don't know crash history, can't return if broken
Buy used if: you know what to check (no bearing damage, motors spin smooth)
Avoid used if: you're a beginner unsure about quality signs
3: Skip Optional Stuff First
Don't buy:
- "Premium" carbon fiber props (regular props work fine)
- Expensive battery cases (ziplock bags work)
- Drone insurance (rarely worth it for budget drones)
- Weatherproof bags (cheap cases are fine)
Add these upgrades later once you're actually flying and know what helps.
4: Buy From Shops With Return Policies
GetFPV, Amazon, and BandGood have reasonable return windows. Cheaper shops in China won't.
Better to pay 5% more and have 30-day return protection than save $20 and get stuck with broken gear.
Upgrading From Budget Setups
Once you outgrow your budget setup, here's the logical upgrade path:
From Build #1 (Cetus Pro): Upgrade goggles first ($150-250). Keep drone, transmitter, batteries. Jump to digital video with minimal additional cost.\n\nFrom Build #2 (Tinyhawk III): Upgrade to better goggles ($200-300) or add a second drone for different flying styles. The Tinyhawk stays useful as your backup.
From Build #3 (CineLog): Add digital VTX ($150-200) while keeping the frame. Or upgrade to larger cinewhoop like CineLog 35 (reuse transmitter, goggles, batteries).
In each case, your initial investment doesn't go to waste. Budget platforms are valuable as backup drones or learning tools for friends.
Conclusion
You don't need to spend $1500+ to start FPV. Honest truth: you need to spend $300-500 to get flying, then another $100-200 for realistic battery needs.
My recommendation for most people: Start with Build #1 (Cetus Pro, $299). Learn for 2-3 months. Then upgrade based on what you actually want to do (speed, video, range, etc.). You'll waste less money and make better upgrade choices knowing what you actually enjoy.
My recommendation for people with $500 budget: Get the Emax Tinyhawk III Plus (Build #2) on sale. Digital video quality makes learning faster, and DVR recording keeps you engaged.
My recommendation for experienced pilots new to FPV: Build #3 (CineLog cinewhoop). You've got the technical skills to handle PNP assembly, and the platform matches your skill level.
Stop overthinking. Pick one, order it today, charge the batteries, and fly tomorrow. The best budget FPV setup is the one you actually start flying.
For more details on specific drones, check our best FPV drones 2026 complete guide. If $500 is still too steep, see our best FPV drone under $300 guide for even tighter budgets. Want to understand the differences between analog and digital? Read our complete analog vs digital FPV comparison. Ready to build your own? Our how to build first FPV racing drone guide walks through the full process step-by-step.
FAQ
Q: Can I really get a complete FPV setup for under $500?
Yes, but you need to be smart about which components matter. Batteries matter. Video quality matters. Drone price doesn't matter as much as people think.
Q: What's the cheapest I can go and still have something that flies reliably?
$250-300 gets you the Cetus Pro kit. Under that, you're buying questionable quality from sketchy sellers. Not worth the hassle.
Q: Why do I need so many batteries?
Flight times are short (4-8 minutes). You can't get long sessions with one battery. Want 20 minutes of flying? You need 4-5 batteries minimum. No way around this.
Q: Should I buy the cheapest goggles?
No. Bad goggles cause eye strain and make FPV miserable. Spend at least $100-150 on goggles. It's worth it.
Q: Can I use my drone with a friend's goggles?
Only if they use the same video system (analog, DJI, HDZero, etc.). Different systems aren't compatible. Check before buying.
Q: What if I want 4K video on a budget?
You can't. 4K recording requires larger drones ($800+). Budget drones max out at 720p or 1080p.