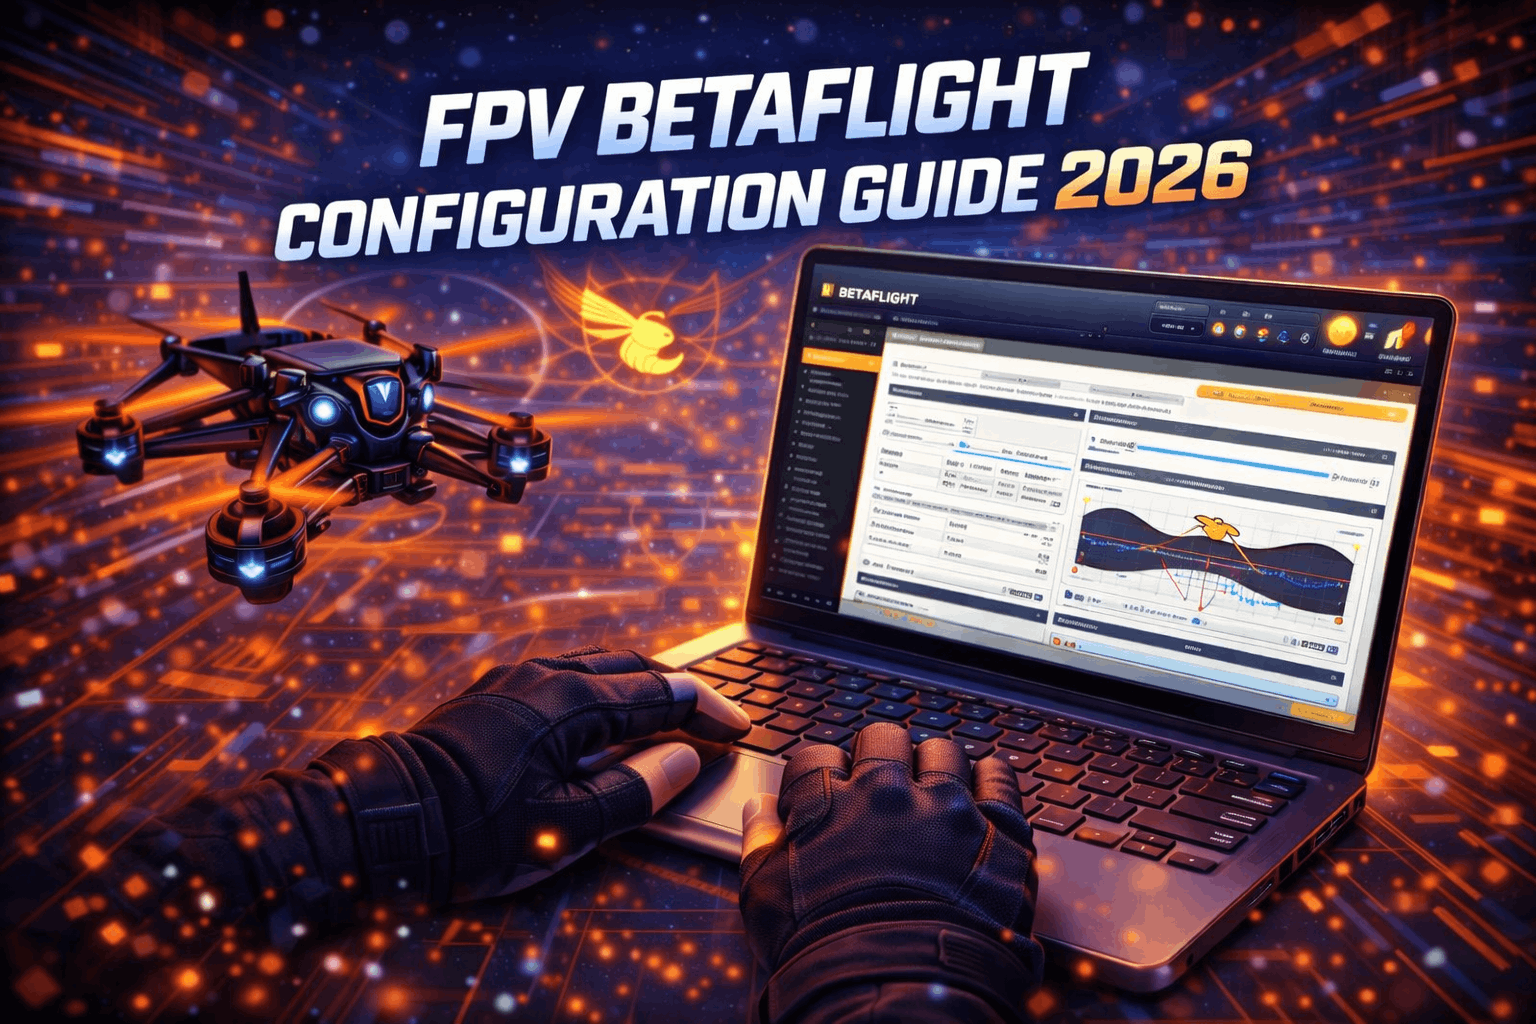
Introduction
I’ve configured Betaflight on probably 20+ builds at this point, and I still remember the cold sweat of my very first time. Tabs everywhere, sliders and numbers that sound like engineering jargon, and a constant fear of clicking the wrong thing and “bricking” my quad. I didn’t brick it—but I did spend three hours troubleshooting a receiver that wouldn’t bind because I’d enabled Serial RX on the wrong UART. Classic beginner mistake.
The truth is, you don’t need to understand every single option to get a solid, reliable Betaflight setup. You just need to work through the essentials in the right order, understand why you’re changing each setting, and keep safety front and center.
This Betaflight configuration guide for 2026 is written for real FPV pilots, not firmware developers. The goal is simple: take you from a fresh flight controller to a safely flying quad using Betaflight, with clear explanations along the way. We’ll start with what Betaflight actually is, move through installation and connection, then walk tab by tab through the core setup: board orientation, receiver, modes, motors, OSD, and basic PID tuning. By the end, you’ll have a quad that arms, responds correctly to your sticks, and flies well enough to start learning—without blindly trusting presets you don’t understand.
Note: This guide contains affiliate links. If you purchase through our links, we may earn a commission at no extra cost to you. This helps support our testing and content creation.
What is Betaflight?
Before touching a single setting, it helps to know what Betaflight actually is. Betaflight is firmware—software that runs directly on your flight controller. If your frame and motors are the body of your FPV drone, Betaflight is its nervous system. It reads your stick inputs, takes data from sensors like the gyro and accelerometer, and constantly adjusts motor outputs to keep the quad under control.
Betaflight exists because FPV flying demands fast, highly configurable control. It’s open source, which means a global community of developers and pilots contribute improvements. That’s why you see regular releases like Betaflight 4.5 or the new date-based versions such as Betaflight 2025.12—they’re iterations on the same core idea: give pilots more control and better flight performance.
There are other firmware options: KISS focuses on simplicity with fewer options and a more “locked down” approach; EmuFlight forked from older Betaflight versions and leans into smooth, cinematic feel; INAV and ArduPilot target GPS and autonomous flight. I’ve tried KISS on a couple of builds and appreciated the simplicity, but I always come back to Betaflight for the flexibility and community support. For FPV acro flying, nothing else comes close in terms of features and active development.
What can you control with Betaflight? Pretty much everything about how your quad flies: receiver inputs, mixer layout, motor protocols, rates, filters, flight modes, OSD, failsafe, and more. What you can’t fix with Betaflight is bad hardware, terrible solder joints, or a miswired quad. Firmware assumes the basics are right; configuration is about telling the flight controller what hardware you have and how you want it to behave.
Because every build is different—frame, motors, ESCs, receiver, VTX—there is no universal “perfect default”. Factory defaults are safe starting points, not a full setup. Without proper Betaflight configuration, even a premium bind-and-fly quad can feel twitchy, fail to arm, or behave unpredictably. This guide shows you how to configure Betaflight so your quad knows what it is, how it’s wired, and how you want it to respond.
Before You Start: Prerequisites
Before diving into Betaflight setup, make sure you have everything you need on the bench and that your hardware is assembled correctly. I keep a dedicated “config kit” in a small bag—USB cable, laptop, spare props for later, and my phone with the FC wiring diagram open. Having everything ready saves a lot of back-and-forth.
You’ll need:
- A computer (Windows, macOS, or Linux) with Betaflight Configurator / Betaflight App installed.
- A good quality USB cable that supports data, not just charging. Many “phone cables” only carry power and will never connect to your flight controller. This is the #1 reason beginners can’t connect—I’ve seen it dozens of times. A reliable USB data cable for FPV configuration can save a lot of frustration.
- Your FPV quad fully assembled, with a compatible flight controller installed and wired to ESCs, receiver, VTX, and camera.
- A fully charged LiPo battery for motor testing later. Make sure your batteries are in good condition—sagging voltage during motor tests can give misleading results.
- Most importantly: props completely removed from all motors.
If this is your first build, make sure you’ve followed the hardware assembly steps in our how to build your first FPV racing drone guide before configuring Betaflight.
A few critical safety rules:
- Never work on Betaflight with props on. Motor tests, receiver setup, and failsafe checks all involve spinning motors unexpectedly. Even experienced pilots get bitten when they skip this. I had a prop fly off during a motor test early on because I “just wanted to check one thing real quick.” It hit the ceiling. Don’t be me.
- Avoid powering USB and battery at the same time unless you know your flight controller’s power design. Many modern boards handle this fine, but some cheaper boards can overheat voltage regulators when powered from both USB and LiPo.
- Back up before you change anything. Once you have a working configuration, you’ll create a backup in the CLI so you can restore it later if an update goes wrong.
Installing Betaflight Configurator
Betaflight is configured through the Betaflight App (formerly Betaflight Configurator). This is a desktop/web application that talks to your flight controller over USB.
- Go to the official Betaflight site or documentation and follow the link to the Betaflight App. For current versions, you can use the web app at
app.betaflight.comor download the native installer. - Download the latest stable release compatible with your firmware (for 2025.12 and 4.5+, the latest Betaflight App versions are required).
- Install the app like any other program on your OS. On Windows, you might also need to install drivers or use a tool like ImpulseRC Driver Fixer if the FC doesn’t show up as a COM port.
- Connect your quad to the computer via USB, then launch the Betaflight App.
- In the top-right, select the COM port that appeared when you plugged in the quad, then click Connect.
If it fails to connect, check your USB cable first (swap for a known-good data cable), then try a different port. Only after that should you start suspecting drivers or the flight controller itself. In my experience, 90% of connection issues are just bad cables. Keep a known-good data cable labeled and separate from your charging cables.
The Setup Tab: Essential First Steps
Once connected, Betaflight drops you into the Setup tab, showing a 3D model of a quad and basic status information. This is where you teach Betaflight about the physical orientation of your flight controller and verify that the basics are working.
1. Board Orientation and Calibration
Gently move and tilt your quad in your hand and watch the 3D model.
- If the model moves exactly like the quad, your board alignment is correct.
- If roll or pitch seem reversed, or the quad appears to tilt in the wrong axis, your flight controller isn’t mounted in the “arrow forward” orientation Betaflight expects.
Instead of remounting the board, you can correct this in Board and Sensor Alignment. This tells Betaflight how the FC is rotated in the frame.
- In the Setup tab, scroll to Board and Sensor Alignment (or use the dedicated Configuration > Board Alignment section, depending on app version).
- If your FC is rotated 90° or 180° to fit the frame, set the appropriate yaw offset (e.g., 90, 180, 270 degrees).
- Click Save and Reboot, then verify the 3D model now moves correctly.
Next, calibrate the accelerometer:
- Place the quad on a perfectly level surface.
- Click Calibrate Accelerometer and wait a few seconds.
Even if you plan to fly mostly in Acro mode, a calibrated accelerometer helps with safety features and angle-based modes. I calibrate mine every time I change the stack or do a major rebuild—it takes 5 seconds and prevents weird horizon drift issues.
2. Arming Disable Flags
At the bottom of the Setup tab, you’ll see Arming Disable Flags. These messages are Betaflight’s way of saying “here’s why I refuse to arm.” Common flags include:
- MSP / CLI – you’re connected to the configurator, so arming is blocked.
- THROTTLE – your throttle isn’t at minimum.
- RXLOSS – receiver signal is missing.
- ANGLE – accelerometer not calibrated when angle mode is enabled.
These are safety checks, not errors to be bypassed. Your goal is to make them go away by fixing the underlying issue, not by disabling them. I’ve seen people in forums recommend disabling arming flags to “fix” problems—that’s like disconnecting your car’s check engine light. The problem is still there; you just can’t see it.
Later, if the quad won’t arm in the field, you can come back to this list (or use the CLI status command) to see what’s wrong.
3. System Configuration: Loop and Protocol Basics
Modern Betaflight defaults are good, but it’s worth understanding key options.
- PID loop and gyro update frequency: Betaflight will usually choose sane defaults (e.g., 4 kHz/4 kHz) for most F4/F7 controllers. For a first setup, leave these at defaults—changing them without understanding filtering can cause more harm than good.
- ESC/Motor protocol: This should be set to DShot (typically DShot300 or DShot600). DShot is a digital protocol that sends precise throttle commands to ESCs and also supports advanced features like bidirectional DShot and RPM filtering. Compared to older analog protocols like Oneshot or Multishot, DShot is more reliable and doesn’t require ESC calibration.
In the Configuration tab (we’ll revisit this), you’ll confirm the correct DShot protocol later.
4. Motor Idle (Dynamic Idle)
Betaflight uses a “digital idle” value to keep motors spinning just above stall speed when armed. Too low and motors can desync on sudden throttle cuts; too high and the quad will never fully settle at zero throttle.
- For a basic setup, leaving the default dynamic idle is fine.
- Once you’re flying, you can revisit Dynamic Idle (in PID tuning or Configuration, depending on version) to fine-tune landing behavior.
For now, the Setup tab’s job is done once the model moves correctly, the accelerometer is calibrated, and you understand what arming flags are telling you.
Ports Tab: Connecting Your Peripherals
Next, click on the Ports tab. Here, you tell Betaflight what each UART (serial port) on your flight controller is used for. Think of UARTs as “plugs” for smart devices like receivers, VTXs, and GPS.
This tab caused me the most confusion as a beginner because the terminology is unfamiliar. Don’t overthink it—just match what’s wired to where.
Understanding UARTs
Each UART has two directions: TX (transmit) and RX (receive). Devices like serial receivers (CRSF/ELRS), SmartAudio/Tramp VTX control, and GPS need a UART. The goal is to:
- Enable Serial RX on the UART that your receiver is wired to.
- Enable Peripherals (SmartAudio, IRC Tramp, VTX, GPS) on the right UARTs.
Receiver Setup in Ports
- Look at your FC wiring diagram and find which UART the receiver is on (e.g., RX2/TX2).
- In the Ports tab, find that UART row.
- In the Serial RX column, toggle that UART ON.
- Click Save and Reboot.
You do not enable both Serial RX and VTX control on the same UART unless specifically designed. One UART per serial job keeps things clean. This is the mistake I mentioned in the intro—I enabled Serial RX on UART1 instead of UART2 and spent hours wondering why my receiver wouldn’t work. Always double-check your FC wiring diagram.
VTX and GPS
- If your VTX supports SmartAudio or IRC Tramp and is wired to a UART TX pad, choose the correct protocol under the Peripherals dropdown for that UART.
- For GPS, enable GPS on the UART it’s wired to, then later configure GPS settings in the Configuration tab. If you’re building a long range setup, GPS configuration becomes especially important for rescue and return-to-home features.
Common pitfalls include enabling features on the wrong UART or enabling multiple conflicting peripherals on one port. When in doubt, refer to your FC’s manual; it usually provides a recommended mapping.
Configuration Tab: Building Your Setup
The Configuration tab is where your quad’s personality really comes together. You’ll define frame type, ESC protocol, receiver type, and core features. This is the tab I spend the most time in on every new build.
Mixer Configuration
At the top, you’ll find the Mixer section.
- Most freestyle and racing quads use Quad X. This tells Betaflight you have four motors in the standard X layout.
- Only change this if you’re running something unusual (hexacopter, tricopter, or specific deadcat mix with a dedicated preset).
Leave custom mixes alone unless you know exactly what you’re doing. The default Quad X mapping, combined with proper motor numbering, works for nearly every 5” build.
ESC / Motor Features
Here you confirm your ESC protocol and important motor options.
- Set ESC/Motor Protocol to DShot300 or DShot600 depending on your ESC capabilities and FC CPU. DShot300 is safe and reliable for 4k PID loops; DShot600 is fine on modern hardware.
- Enable Bidirectional DShot if your ESC firmware supports RPM telemetry (BLHeli_32 or Bluejay on BLHeli_S). This unlocks RPM filtering, which dramatically improves performance and reliability. In my opinion, bidirectional DShot is the single biggest improvement you can make to flight quality for free—just a checkbox that transforms how clean your gyro signal is.
- Ensure Motor Stop is disabled (motors should spin slowly when armed) unless you have a specific reason.
Choosing DShot means no ESC calibration step is required and you can use advanced Betaflight motor features. If you’re choosing motors for a new build, make sure they pair well with ESCs that support bidirectional DShot.
Receiver Setup
Scroll to the Receiver section.
- Set Receiver Mode to Serial-based receiver (SBUS, iBUS, Spektrum, CRSF) for any modern radio link.
- Set Serial Receiver Provider:
- CRSF for Crossfire and ExpressLRS.
- SBUS for FrSky / older radios.
- IBUS for FlySky iBus.
- Click Save and Reboot.
If you’re running ExpressLRS (which I’d recommend for most pilots in 2026—the range and latency are excellent), CRSF is the protocol to use. Your radio controller choice determines which protocol you’ll be setting here.
After reboot, go to the Receiver tab (we’ll come back in a moment) to verify.
Other Configuration Options
In the same tab, enable/disable features like:
- Accelerometer – keep enabled for Angle/Horizon modes.
- OSD – if your FC supports Betaflight OSD and you want on-screen data.
- GPS – if you’ve wired a GPS module.
- Airmode – usually set to “always on” so the quad has authority at zero throttle. Airmode is one of those features that sounds optional but is actually essential for any acro flying.
For a first-time Betaflight setup, stick to enabling only what you know you have wired. Extra features can come later.
Receiver Tab: Channel Mapping and Calibration
Now visit the Receiver tab.
- Turn on your radio and ensure it’s bound to the receiver.
- Move your sticks and watch the channel bars.
You want:
- AETR or TAER mapping to match your radio. If pitch/yaw/roll are on the wrong bars, change the Channel Map dropdown until moving roll affects the ROLL bar, pitch affects PITCH, etc.
- Stick centers around 1500 and minimums near 1000, maximums near 2000.
If endpoints are slightly off, you can often fix them on the radio (subtrims and endpoints). Betaflight does allow scaling and deadbands, but start by calibrating the transmitter properly.
Verify that when you move the sticks:
- Roll right makes the ROLL bar move to the right.
- Pitch forward makes PITCH increase.
- Yaw right makes YAW increase.
- Throttle up makes THROTTLE increase.
If any direction is reversed, fix it in your radio (channel reverse) rather than in Betaflight. Always fix at the source—it’s cleaner and easier to troubleshoot later.
Flight Modes and AUX Functions
Still in the Configuration flow, you’ll define how your quad arms and which modes it uses through the Modes tab (covered in detail later). For now, understand:
- Angle mode self-levels and limits tilt—good for first hover tests.
- Horizon mode is a hybrid that self-levels near center but allows flips at extremes.
- Acro (Rate) mode is full manual, where most FPV pilots eventually end up.
You’ll map these to switches so you can change modes in flight.
If this is your first build, make sure you have a dedicated ARM switch and a separate mode switch; never arm with a stick gesture only. Stick gestures are unreliable and dangerous—I’ve seen quads arm accidentally in someone’s hands because of a thumb bump. Always use a physical switch.
Motors Tab: Critical Testing
The Motors tab is where you test individual motors and confirm direction and numbering. It’s also where people injure themselves if they ignore safety.
Safety Rules (Again):
- Props off. Not “just for a second”, not “I’ll be careful”. Completely off.
- Keep your face and hands away from the prop line even with props off—habits matter.
When you open the Motors tab, you’ll see a big warning and a checkbox saying you understand the risks.
- Check the warning box only after confirming props are off.
- Use the Master slider to gently spin all motors together at low speed and listen for grinding or irregular sounds.
- Then, use individual motor sliders (M1–M4) to spin each motor separately.
You’re checking two things:
- Numbering: When you move Motor 1’s slider, the correct corner on your frame should spin, matching the diagram in the tab. If it doesn’t, you’ll need to remap motors in Betaflight or correct wiring.
- Direction: Betaflight diagrams show which way each motor should spin (typically alternating around the quad). If a motor spins the wrong direction, you can:
- Reverse that motor in your ESC configuration software (BLHeli_32 / Bluejay), or
- Swap any two of its three wires between ESC and motor.
Do not change motor direction by flipping props—it must be correct at the motor level.
If you hear grinding, scraping, or a motor fails to start smoothly, you may have damaged bearings, foreign objects between bell and stator, or ESC wiring/timing issues. Don’t try to tune around a bad motor—replace it first. Our maintenance guide covers how to diagnose motor problems systematically.
Modes Tab: Setting Up Switches
Now go to the Modes tab. This is where you map AUX channels from your radio to functions like ARM, modes, and buzzer. I consider this the most important safety-related tab in all of Betaflight.
ARM Switch
- In the Modes list, find ARM and click Add Range.
- Flip your chosen arm switch on the radio and see which AUX channel responds in the preview.
- Select that AUX channel from the dropdown (e.g., AUX 1).
- Drag the yellow range bar so that when your switch is in the “armed” position, the channel value sits inside the range.
- Click Save.
From now on, the quad will only arm when:
- All arming flags are clear.
- The ARM mode is active (switch in range).
Flight Modes
You can configure multiple modes, but keep it simple at first.
- Add ANGLE on a second switch position. This gives you a self-level mode for first hover tests.
- Optionally, add HORIZON on another range if you want a hybrid mode.
- Leave no Angle/Horizon active for Acro (Rate) mode—Betaflight defaults to Acro when no attitude mode is selected.
Many pilots use a 3-position switch:
- Position 1: Angle (for takeoff/landing or beginners).
- Position 2: Horizon or Acro Trainer.
- Position 3: Acro.
My personal setup: I use a 2-position switch for ARM on the left shoulder and a 3-position for flight modes on the right. Simple, reliable, no confusion in the field. Some pilots get fancy with 10+ aux channels—I’d rather have fewer switches I can find by feel without looking.
Add BEEPER on another AUX so you can make the quad beep when lost (this will save your quad eventually—it saved mine twice in tall grass), and consider mapping features like Flip Over After Crash later.
New to different flight modes? Our best FPV simulators 2026 guide will help you practice these safely before your first real flight.
OSD Tab: Customizing Your Display
The OSD (On-Screen Display) tab lets you choose what information appears in your goggles.
For a first Betaflight setup, focus on essentials:
- Main battery voltage and/or average cell voltage. This is the most important OSD element—without it, you’ll kill your batteries by overdischarging.
- Flight time or on-time.
- RSSI or Link Quality, depending on your receiver.
- Arming status / warnings.
- Optional: current draw and mAh consumed if you have a current sensor.
Drag items from the list onto the preview screen and position them where they’re visible but not blocking your camera view. Keep the layout simple—too much clutter makes it harder to fly. I use voltage in the top-left, link quality top-right, and flight time bottom-center. That’s it. Everything else is noise for normal flying.
Set a low-voltage warning suitable for your battery type (e.g., around 3.5V per cell under load for 4S/6S packs as a conservative starting point). Betaflight will flash warnings when you hit that threshold. Our battery guide explains voltage thresholds in more detail if you’re unsure about safe cutoffs for your specific packs.
PID Tuning: The Basics
The PID Tuning tab is where you can turn a good-flying quad into a great one—or make it unflyable if you change things blindly. For 2026, Betaflight’s default PIDs and filter presets are very good for most 5” builds. That means you can usually start flying with defaults, but you should know what’s happening.
In simple terms:
- P (Proportional) decides how hard the quad pushes back when it’s off target. More P = sharper, more locked-in feel, but too much causes fast oscillations.
- I (Integral) deals with long-term errors, like wind drift. More I helps hold attitude, but too much can cause slow “wobble” or bounce-back.
- D (Derivative) looks at how fast error is changing and dampens overshoot. More D smooths out movements but adds heat and can amplify noise.
Modern Betaflight gives you sliders instead of raw numbers for beginners. You can:
- Leave everything at default for your first flights.
- If the quad feels loose or bouncy, gently raise the master slider a few points.
- If it feels too twitchy or you see fast oscillations, lower it a bit.
As a beginner, your main focus should be:
- Fly on default PIDs and filters after confirming everything else works.
- Only start changing PIDs if you notice obvious issues: constant wobbling, overshoot on flips, or motors getting very hot.
I’ve written a dedicated PID tuning guide that goes much deeper into this topic, including step-by-step slider tuning and how to diagnose specific oscillation types. But for your first Betaflight setup, defaults are your friend. Get airborne first, tune later.
Blackbox and Filtering
Blackbox is Betaflight’s built-in flight logger. It records gyro data, motor outputs, and other telemetry so you (or an expert) can analyze vibrations and tuning issues later.
- Some flight controllers log to internal flash memory.
- Others include an SD card slot, which is far better for regular logging.
By default, Betaflight applies sensible filtering presets tailored to your craft type (5” freestyle, cinematic, whoop, etc. via presets). You don’t need to understand every filter term to fly safely.
At this stage:
- Make sure Blackbox is enabled if your hardware supports it.
- Leave filter settings at their defaults or use an official preset matching your build.
- Consider Blackbox as a “black box” flight recorder: you may not use it today, but it’s invaluable if you get serious about tuning later.
If you’re shopping for a flight controller for a new build, I’d strongly recommend one with an SD card slot for Blackbox. Internal flash fills up in a few flights and the data is much harder to work with. It’s a small feature that makes a big difference when you eventually want to analyze your tune.
Saving and Testing
Once you’ve worked through Setup, Ports, Configuration, Receiver, Motors, Modes, and OSD, it’s time to lock in your work and plan a safe first flight.
- In each tab, make sure you’ve clicked Save after changes. Betaflight doesn’t auto-save—I’ve lost entire configurations by forgetting this. Click Save on every tab before moving on.
- Go to the CLI tab and type
diff all, then copy the output to a text file. This is your configuration backup. I save mine as[quad-name]-[date]-betaflight.txtso I can find it later. - Disconnect from Betaflight and unplug USB.
- Mount your props correctly (direction and orientation matter—match them to the motor spin diagram from the Motors tab).
- For the first flight, choose a large open area with soft ground if possible. Make sure you’re familiar with local drone regulations before heading out.
Your first test plan should be conservative:
- Arm in Angle mode and slowly lift off just enough to hover.
- Check that the quad doesn’t immediately yaw, roll, or pitch hard in any direction. If it does, disarm immediately—something is wrong (usually motor direction or prop placement).
- Gently test roll, pitch, and yaw to confirm the controls respond correctly.
- Land and feel the motors—warm is fine, hot is not.
If everything feels stable, you can start experimenting with Horizon and eventually Acro modes. If you’re brand new to FPV flying, spend your first several packs in Angle mode getting comfortable with the controls before switching to Acro. There’s no rush, and confidence comes from hours, not from switching modes early.
Common Issues and Solutions
Even if you follow everything perfectly, Betaflight can still throw curveballs. Here are the most common problems I’ve encountered across my builds and what to do about them.
Quad Won’t Arm
Symptoms: You flip the arm switch, nothing happens.
Steps:
- In Betaflight, check the arming disable flags in the Setup tab or type
statusin the CLI. - Common flags and fixes:
- THROTTLE – your throttle isn’t low enough; recalibrate radio endpoints or adjust subtrim.
- RXLOSS – no receiver signal; check binding and wiring, confirm channel activity in Receiver tab.
- MSP/CLI – you’re still connected to Betaflight; disconnect USB.
- ANGLE – accelerometer not calibrated; calibrate on a level surface.
- Don’t disable flags in the CLI unless you know exactly why they’re there—they exist to protect you.
This is probably the most common issue I help new pilots with. Nine times out of ten it’s RXLOSS (wrong UART) or THROTTLE (endpoints not reaching 1000).
Motors Spinning the Wrong Way
Symptoms: The quad flips over on takeoff (“turtle of death”).
- Go back to the Motors tab (props off) and confirm each motor’s spin direction against the diagram.
- For any incorrect motor, reverse direction in your ESC software (BLHeli_32/Bluejay) or swap two of the three motor wires.
- Re-test before putting props back on.
This is scary but harmless if your props are off during testing. The quad flipping on first arm is almost always wrong motor direction—not bad PIDs, not a broken FC. Check motors first.
Unstable or Wobbly Flight
Symptoms: Shaking in hover, oscillations after moves, or general “nervous” feel.
- Verify mechanical issues first: bent props, loose arms, soft mounting. Our crash recovery guide covers post-crash diagnostics.
- Try softer props or slightly heavier ones; very aggressive props can cause noise on certain builds.
- If using aggressive PIDs or non-default filters, reset to the appropriate preset for your craft.
- If motors are extremely hot, you may be over-propped or over-filtered.
Configuration Won’t Save
Symptoms: Settings revert after reboot.
- Ensure you click Save on each tab before leaving.
- Check for full flash memory on some very old F3/F4 boards; if so, you may need to disable non-essential features to free space.
- Try resetting to defaults via CLI (
defaults) and reconfiguring from scratch if things are very corrupted.
USB Connection Problems
Symptoms: FC isn’t visible as a COM port; Betaflight can’t connect.
- Try another USB cable (data-capable). Seriously—this fixes it 90% of the time.
- Use a different USB port or computer.
- On Windows, install or repair drivers (e.g., ImpulseRC Driver Fixer).
- Check if the FC has a dedicated boot button; if in bootloader mode, it may appear differently to the OS.
FAQ: Betaflight Configuration
Do I need to change PIDs before my first flight?
No. Modern Betaflight defaults are good enough for most 5-inch builds. Focus on getting orientation, receiver, modes, and motor directions correct first. Only touch PIDs if you see clear problems like constant oscillations or severe bounce-back. Our PID tuning guide covers when and how to make changes.
Can I configure Betaflight without removing props?
You can, but you absolutely should not. Many steps (receiver setup, motor testing, failsafe) can unexpectedly spin motors. Even small quads can cause serious injury. Get in the habit of removing props any time you connect to Betaflight on the bench.
What’s the biggest mistake beginners make in Betaflight setup?
Skipping understanding and just copying someone else’s CLI dump or preset blindly. That often masks wiring mistakes or sets features your hardware doesn’t support. It’s better to spend an extra 30 minutes learning what each essential tab does than to chase mysterious behavior later. The second biggest mistake is using a charge-only USB cable and thinking the FC is broken.
How do I know if my quad is “tuned well enough” to fly?
If it arms without flags, hovers without fighting you, responds predictably to stick input, and motors come down only warm, you’re good to fly and practice. Fine-tuning PIDs and filters is about refinement, not basic airworthiness.
Do I need Blackbox and advanced filtering from day one?
No. They’re powerful tools, but not prerequisites for flying. Enable Blackbox if your FC supports it so logs are there when you need them. Until then, concentrate on basic configuration and stick time.
Is it safe to upgrade Betaflight as a beginner?
Stick to stable releases and only upgrade when you have a reason (bug fix, feature you need). Always back up your configuration first (diff all in CLI) and be prepared to re-setup from scratch if things change between versions. I upgrade about once a year and only when a release has been out long enough for major bugs to be found and fixed.
Can I use Betaflight for fixed-wing or other craft types?
Betaflight does support wings and non-standard mixers, but if you’re primarily flying fixed-wing or GPS-intensive missions, INAV or Ardupilot are usually better fits. For FPV quads, Betaflight remains the go-to.
How long does a full Betaflight setup take?
For a first-time setup, expect 1-2 hours if you’re being careful and learning as you go. By your third or fourth build, you’ll have it down to 20-30 minutes. I can configure a new quad in about 15 minutes now, but only because I’ve done it so many times that the tab order is muscle memory.
Final Tips
Betaflight configuration seems overwhelming until you’ve done it once or twice. Then it starts to feel like a logical checklist: orientation, ports, configuration, receiver, modes, motors, OSD, then test. The most important habit you can build is making small, incremental changes and testing after each one. Don’t change a dozen things and then try to guess which one broke something.
Make regular backups through the CLI so you can always roll back to a known-good state, especially before flashing new firmware. Lean on the community—Betaflight has one of the most active FPV ecosystems around, with countless guides, YouTube tutorials, and Discord/Reddit helpers who’ve seen every weird issue before.
Keep your essential accessories organized and ready for bench sessions—a good USB cable, your laptop, and a clean workspace make the configuration process much smoother.
Above all, remember that Betaflight setup is a skill like flying. The first time is slow and confusing. By your third or fourth build, you’ll be able to configure a quad from scratch in under an hour, with a mental model of what each tab is doing. Use this Betaflight setup guide as your baseline, refer back to it when something doesn’t make sense, and you’ll be well on your way from “Betaflight for beginners” to confident Betaflight tuning.


