That locked-in freestyle feel where your quad tracks every stick input like it’s reading your mind? PIDs. The wobbles trashing your GoPro footage? PIDs. The annoying bounce-back after every flip? Also PIDs.
PID tuning has this reputation for being impossibly complex—control theory, differential equations, hours of Blackbox analysis. In practice, it’s a systematic process you can learn in a few sessions. I’ve tuned dozens of builds, from beat-up 5-inch bashers to clean cinematic rigs, and the methodology here is what I wish someone had handed me when I started instead of letting me waste weeks making random changes and hoping something stuck.
This guide walks through the full process: what each parameter actually does, how to set up your filters, the step-by-step tuning order, and how to diagnose every common problem. If you’ve been flying Betaflight defaults and want to extract more from your build, this is where you start.
Note: This guide contains affiliate links. If you purchase through our links, we may earn a commission at no extra cost to you. This helps support our testing and content creation.
What PIDs Actually Do
Your flight controller runs a feedback loop thousands of times per second. The gyro measures your drone’s actual rotation, the FC compares that against your stick input, and the PID controller calculates motor adjustments to close the gap. On a modern F7 or H7 board with an MPU6000 gyro, this cycle runs at 8kHz. Boards with BMI270 gyros run at 3.2kHz. Either way, it’s fast enough that the corrections feel instantaneous.
“PID” stands for three corrections working together. Think of them as a team where each member has a specific job, and changing one person’s workload affects the others.
P (Proportional) is the reaction force. It responds proportionally to the error between where your quad is and where you told it to be. Crank P up and the quad snaps to stick inputs instantly—but push too far and it overshoots, corrects, overshoots again, creating visible oscillation. Drop P too low and everything feels mushy, like flying through syrup. For freestyle, you want moderately high P: responsive enough to track quick stick movements without ringing on direction changes.
I (Integral) is the long-term correction. It accumulates error over time to fix persistent drift. Wind pushing you sideways during a hover? I-term notices you’ve been off-target for a while and increases correction until you’re back on line. Too much I makes the quad feel robotic and can create slow, lazy oscillations. Too little and it won’t hold attitude, drifting during tricks and sustained turns. Most freestyle builds do well with moderate I near Betaflight defaults.
D (Derivative) is the damper. It responds to the rate of change of error—essentially predicting where you’re headed and braking before you overshoot. Without D, high P causes oscillation because there’s nothing to slow the correction down. D is also the only term fast enough to fight propwash oscillation during descents. The catch: D amplifies high-frequency noise from the gyro, which heats motors. Every build has a D ceiling dictated by its noise floor and filtering quality.
These three work as a system. Bumping P without adjusting D creates oscillation. Increasing D without proper filtering cooks motors. Understanding this interdependence is the whole game.
Before You Touch Anything: Prerequisites
Tuning garbage hardware is a waste of time. Get the foundation right first or you’ll spend hours chasing phantom problems that have nothing to do with PID values.
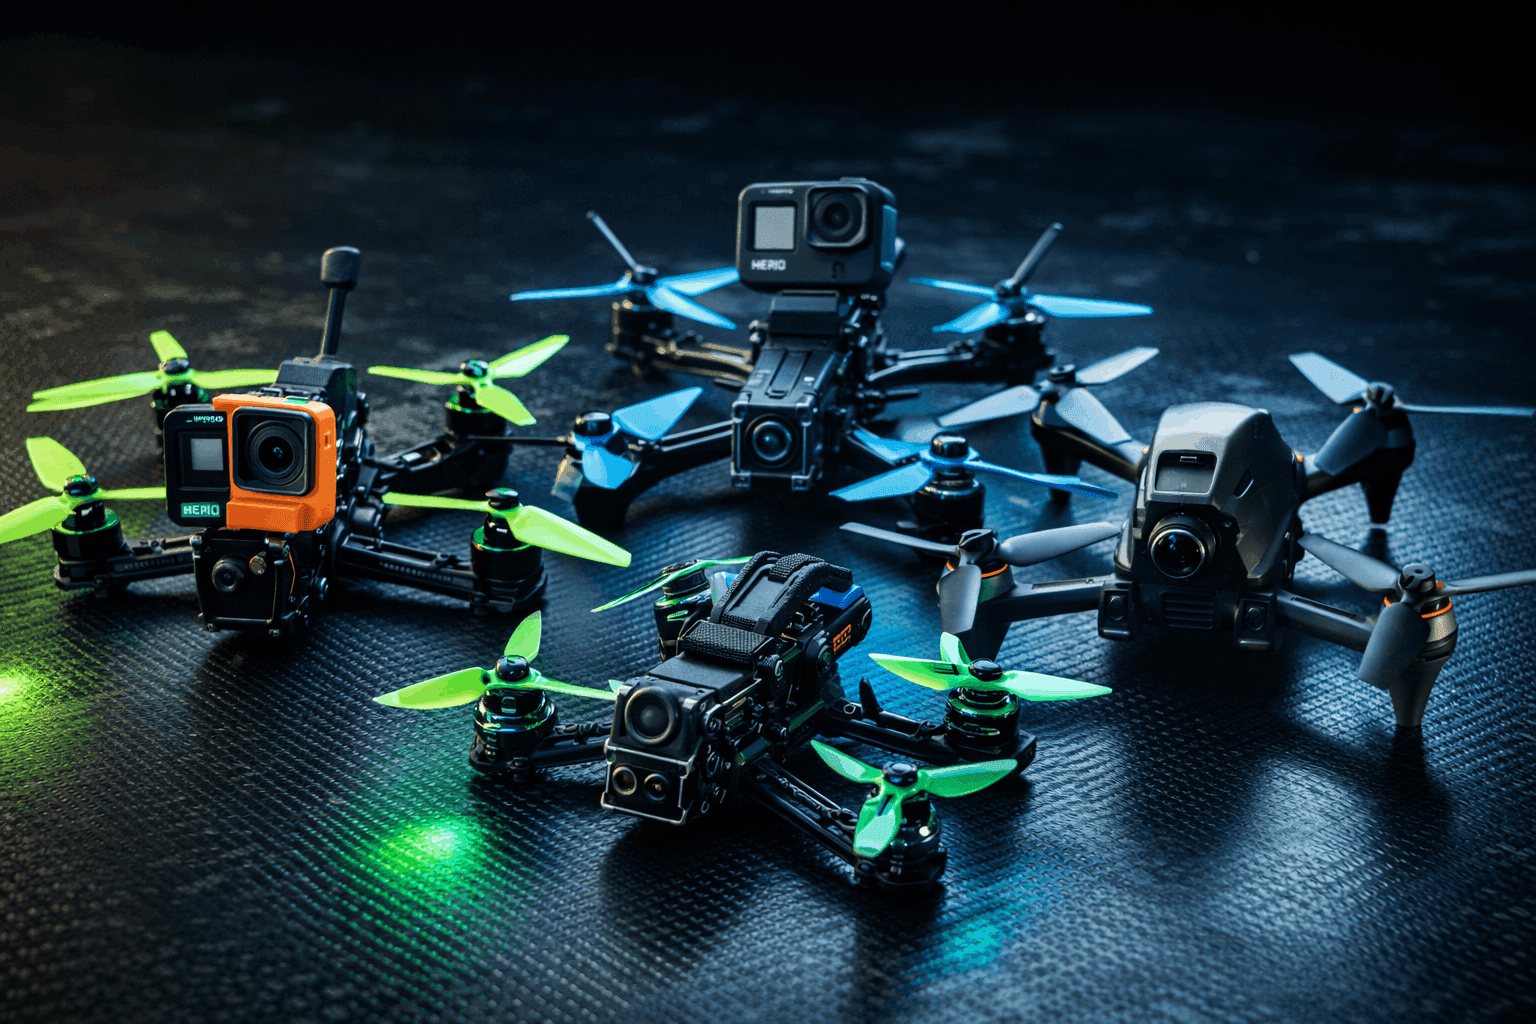
Mechanical health comes first. Tighten every screw on the frame—loose standoffs and flexing arms create vibration that no tune can fix. Check your motor bearings by spinning each bell by hand: they should spin freely with no gritty feeling or play. Run balanced props—not beat-up ones from last week’s crash session. A single chipped prop blade creates vibration patterns that look exactly like PID oscillation in Blackbox logs.
Software baseline matters. Install the latest Betaflight Configurator from GitHub. Verify your motor protocol matches your PID loop rate: DShot600 for 8kHz loops (F7/H7 boards with MPU6000), DShot300 for 4kHz or 3.2kHz loops (F4 boards or BMI270 gyros). Enable bidirectional DShot if your ESCs support it—you’ll need this for RPM filtering, which is the single biggest improvement you can make to filtering quality.
Start from a known baseline. Flash Betaflight defaults for your quad size, or load one of the built-in presets for your radio link and quad type. The 2026 configurator presets are genuinely good starting points. Don’t start from someone else’s YouTube CLI dump—their build isn’t yours, and copying PIDs from a different frame, motor, and prop combination usually creates more problems than it solves.
Do a baseline flight. Fly one pack on defaults and note what you feel without trying to fix anything yet. Oscillation? Mushiness? Bounce-back on flips? Record a Blackbox log if your FC supports it. This gives you a reference point to measure improvement against.
Step 1: Get Filters Dialed Before PIDs
Filters come before PID tuning. Always. Your filters determine how clean the gyro signal is before the PID controller ever sees it, and they set the ceiling for how much D gain your build can handle. Skip this step and you’ll hit motor heat problems that no amount of PID adjustment can solve.
Enable RPM filtering. If your ESCs support bidirectional DShot (most modern ESCs do), RPM filtering should be your first move. It uses actual motor RPM data from the ESCs to place notch filters precisely on motor noise harmonics. This is dramatically more effective than static or dynamic notch filters alone, and it lets you reduce lowpass filtering for less latency. In Betaflight, enabling bidirectional DShot automatically activates the RPM filter. Check that “Gyro RPM Filter” shows enabled in the PID Tuning → Filter Settings tab.
Configure the dynamic notch filter. With RPM filtering active, Betaflight automatically reduces the dynamic notch to a single notch with a higher Q value (narrower bandwidth), since the RPM filter handles motor noise. The dynamic notch then focuses on frame resonance and other non-motor vibration sources. For most clean builds, the automatic settings after enabling RPM filtering work well. If you have a particularly noisy frame or loose components, you might need to increase the notch count to 2.
Minimize lowpass filtering for less delay. This is where latency lives. Every lowpass filter stage adds delay between your stick input and motor response. With good RPM filtering and dynamic notch, you can often reduce the gyro and D-term lowpass filter multipliers (the sliders in Betaflight’s filter tab). Move the sliders right in small increments, fly, and check motor temps after each flight. The goal: remove as much lowpass as possible while keeping motors warm but not hot.
How to tell if your filters are wrong:
- Motors scorching hot after a 30-second hover → noise getting through, filtering insufficient
- Everything feels mushy and delayed → over-filtered, too much lowpass
- High-pitched whine from motors → specific frequency not being caught, check dynamic notch
Step 2: Find Your D Ceiling
This is counterintuitive, but modern Betaflight tuning methodology starts with D, not P. Your maximum usable D gain sets the upper boundary for everything else. Higher D lets you run higher P without oscillation, and D is what fights propwash. But D also amplifies noise, so every build has a hard limit.
The process:
Start with Betaflight’s default D values. Fly a pack with aggressive stick inputs—quick flips, sharp rolls, fast direction changes. Land and immediately check motor temperature by touching each motor bell. They should be warm, not painful to hold.
Increase D by about 10% using the PID tuning sliders or direct value entry. Fly another pack with the same aggressive maneuvers. Check temps again. Repeat this cycle: bump D, fly, check temps.
When motors become uncomfortably hot to hold for more than a second or two, you’ve found your ceiling. Back off to the previous value where they were just warm. That’s your maximum D for this build with your current filtering setup.
Important notes: Better filtering (especially RPM filter) raises your D ceiling because less noise reaches the motors. New, smooth motor bearings allow higher D than worn ones. Temperature testing works best on consistent flying—don’t compare a gentle cruise with a hard freestyle rip. If you want to push D higher, improve your filtering first rather than tolerating hot motors.
Step 3: Dial In P/D Balance
With your D ceiling established, now you tune P to create the right response feel.
Isolate P for clean testing. Before adjusting P, temporarily set feedforward (Stick Response slider) to 0 and Dynamic Damping to 0. This disables feedforward’s contribution to response and makes D gain constant rather than variable. Now stick response comes purely from P, making it easy to identify P-related problems without other variables confusing the picture.
Find the oscillation point. Increase P in 10% increments. After each bump, do quick stick movements: snap rolls, pitch flips, rapid direction reversals. You’re looking for fast oscillation—a visible buzz or shake on quick movements. This often shows up first as audible motor noise during aggressive maneuvers.
When you spot oscillation, back P off by 10-15%. That’s your working value. The quad should feel crisp and responsive on stick inputs without any ringing or vibration on direction changes.
Axis-specific tuning: Roll and pitch typically use similar P values because a 5-inch quad is roughly symmetric. Yaw runs lower P because it has different rotational characteristics—the yaw axis has less authority and doesn’t need as aggressive a response. If you’re getting yaw oscillation specifically, drop yaw P rather than touching roll/pitch.
The P/D ratio matters. Once you’ve found good values, this ratio is your quad’s character. If you later want more or less aggressive response overall, scale both P and D proportionally using the master multiplier slider rather than changing one independently. This preserves the balance you’ve established.
Step 4: Adjust I-Term for Stability
I-term usually needs the least adjustment from defaults. With solid P and D, most of the heavy lifting is done.
When to increase I: If the quad drifts off angle during a hover or doesn’t hold attitude during sustained turns and banked maneuvers, I is too low. Bump it up in small increments until it holds position confidently.
When to decrease I: If the quad feels stiff and robotic—like it’s fighting your inputs with a slight delay—or if you see slow, wandering oscillations (not the fast buzz of P oscillation), I is probably too high. For freestyle, you want enough I to prevent drift without the quad feeling mechanical.
I-term relax is your friend. Betaflight includes I-term relax, which reduces I-term buildup during fast stick movements. This prevents the classic bounce-back after flips and rolls caused by I-term accumulating error during the maneuver and then “correcting” when you stop. Leave I-term relax enabled at its default (setpoint mode, cutoff around 15-20) unless you have a specific reason to change it.
Step 5: Re-Enable and Tune Feedforward
Feedforward adds immediate response to stick movement—it doesn’t wait for error to develop like P does. It reads your stick velocity directly and pre-applies correction, creating that connected, instant-response feeling.
Bring it back gradually. Re-enable feedforward by setting the Stick Response slider back to around 100 (default baseline). Fly and assess: does the quad respond immediately when you initiate a roll or flip, or is there a perceptible lag? If laggy despite good P values, increase feedforward. If the quad overshoots your stick commands—going further than you intended on snaps—feedforward is too high.
Freestyle-specific tip: The feedforward transition parameter controls how much feedforward is active around stick center. Setting transition to 0.3-0.5 reduces twitchiness around center stick (useful for smooth freestyle lines) while keeping full feedforward authority for flips and snaps at stick extremes. For pure racing, leave transition at 0.
Feedforward smoothing matters for ELRS and other high-rate links. If you’re running ExpressLRS at 250Hz or 500Hz, make sure the appropriate preset for your link is loaded—these set feedforward smoothing and averaging values that prevent jitter from the fast packet rate from translating into motor noise.
Step 6: Flight-Test Specific Maneuvers
Theory is nice. What matters is how it flies during actual freestyle. Test each of these scenarios and adjust based on what you find.
Propwash handling: Punch straight up, cut throttle completely, and descend through your own wake. Some oscillation during the descent is normal—you’re literally flying through turbulent air. If it’s violent shaking rather than minor vibration, increase D (if motors allow it) or adjust TPA settings to maintain D authority at lower throttle. Accept that perfect propwash elimination isn’t physically possible; the goal is minimizing it to where it doesn’t wreck footage or feel scary.
Flip and roll precision: Do a quick flip. Does it stop cleanly at the end, or does it bounce back slightly past your stick position before settling? Bounce-back is usually I-term windup—verify I-term relax is enabled and properly configured. Overshoot (going past where you aimed) points to feedforward or P being too high.
Sustained turns and orbits: Hold a banked turn around a fixed object. The quad should track smoothly without drifting wider or tighter. Drift indicates I-term is too low. Wobble during the turn suggests P/D balance needs work.
Flowing freestyle lines: String together several maneuvers—a dive, transition into a roll, pull up into a split-S. Does it feel connected and responsive throughout, or does it go mushy during transitions? A well-tuned quad feels like an extension of your thumbs. If something feels “off” during transitions, it’s often filter delay rather than PIDs—revisit your lowpass settings.
Common Problems and Fixes
Fast oscillation on quick movements. P is too high for your current D, or filtering is insufficient. Lower P by 10-15%, or increase D if motor temps allow. Also check for damaged props—a single nicked blade mimics P oscillation perfectly.
Everything feels delayed and mushy. P is too low, or your lowpass filters are too aggressive. Increase P first. If still mushy, reduce gyro lowpass filter multiplier one notch at a time, checking motor temps between flights. Also verify motor protocol is correct—running DShot300 on an 8kHz loop wastes half your potential update rate.
Motors burning hot. D-term is exceeding what your filtering can handle. Lower D first. If D is already reasonable, improve filtering: enable RPM filter, verify dynamic notch is working, check for mechanical noise sources (loose screws, worn bearings, damaged props). Hot motors are a maintenance issue as much as a tuning one.
Bounce-back after flips and rolls. I-term windup during the maneuver. Enable I-term relax if it’s off, or lower the I-term relax cutoff frequency. If the feature is already active, slightly reducing I-term can help. Increasing D also dampens the bounce.
Violent propwash on descent. This is partly physics and partly tuning. Increase D if thermal headroom exists. Raise TPA breakpoint so D doesn’t get attenuated at low throttle where propwash hits hardest. Reducing lowpass filtering (if motors allow) lets D react faster to propwash oscillations. Flying technique matters too—angled descents create less propwash than straight vertical drops.
Quad drifts in hover. I-term too low, or accelerometer needs calibration. Increase I gradually. If still drifting, recalibrate the accelerometer on a perfectly level surface in Betaflight. Also check that your battery isn’t mounted asymmetrically, creating a weight offset.
Different feel between fresh and depleted packs. This is normal—a 4.2V/cell pack delivers significantly more punch than a 3.5V/cell pack nearing cutoff. TPA (Throttle PID Attenuation) can reduce P and D at higher throttle to maintain consistency. Some voltage-related feel variation is unavoidable and most pilots just adapt.
Using Blackbox for Data-Driven Tuning
Your eyes and ears catch most tuning issues, but Blackbox provides hard data when you need to confirm what’s happening or diagnose something subtle.
Setup: Enable Blackbox logging in Betaflight’s Blackbox tab. Set logging rate to 2kHz—it’s a good balance between resolution and file size. Use an SD card if your FC has a slot; onboard flash fills up fast. Log specific test flights where you’re testing specific things, not entire sessions.
Analysis workflow: Download Blackbox Explorer or PIDtoolbox (both free). Load your log. The gyro trace should be smooth and closely tracking the setpoint (your stick commands). High-frequency fuzz on the trace indicates filtering problems. Oscillation after stick inputs shows P/D imbalance. Slow drift from setpoint reveals I-term weakness.
The spectral heat map is your most powerful tool. In PIDtoolbox, the “Freq x Throttle” spectrogram shows exactly where noise lives across the throttle range. Motor noise shows as diagonal bands (frequency increases with throttle). Frame resonance shows as horizontal lines (constant frequency regardless of throttle). This tells you whether your RPM filter is catching motor noise and whether the dynamic notch is targeting frame resonance correctly.
Don’t over-analyze. Data confirms feel—it doesn’t replace it. If the quad flies well and motors are cool, your tune is good regardless of what the trace looks like at 10x zoom. Spending three hours chasing a trace artifact that has zero perceptible flight impact is time you could spend actually flying. Get it good enough, then go rip packs.
Freestyle vs Racing: Where Tunes Diverge
If you fly both freestyle and racing, understanding the priority differences helps you make informed tradeoffs.
Freestyle prioritizes smooth transitions, strong propwash handling, and a “connected” feel through flowing lines. You want enough D to dampen everything, moderate P for responsive-but-not-twitchy stick feel, and feedforward tuned for smooth initiation rather than instant snap.
Racing prioritizes maximum responsiveness—instant direction changes, zero hesitation. Racers typically run higher P (accepting some oscillation on camera), less D (accepting more propwash because racing lines avoid descents through own wake), and high feedforward for immediate stick response. Check out our best racing drones for freestyle guide for builds that bridge both styles.
Practical advice: If you do both, tune for freestyle first. A good freestyle tune is a smooth, enjoyable baseline. For race day, bump the master multiplier up a couple notches for more aggression. This is easier than trying to smooth out a race tune for freestyle.
Advanced Tips From the Field
The OSD tuning menu saves time. Betaflight’s OSD-based PID adjustments let you change values between packs without reconnecting USB. Land, adjust through your goggles, take off again. This cuts tuning sessions from hours to minutes for iterative changes.
Tune in realistic conditions. Temperature affects motor behavior, prop stiffness, and battery output. If you tune in a cool garage and fly in 95°F summer heat, the quad will feel different. Tune in the conditions you actually fly in.
Same props, same batteries, every session. Switching between Gemfan 51466 and HQProp 5.1x4.6 during a tuning session introduces variables you can’t separate from your PID changes. Pick one prop and one battery type, tune, then test different props afterward.
Save your tune religiously. After every successful tuning session, dump your CLI (type diff all in CLI) and save it to a file labeled with your quad name and date. When you inevitably need to reflash—and you will—restoration takes 30 seconds instead of another full tuning session.
Know when to stop. 90% of the benefit comes from basic P/D tuning with decent filtering. The remaining 10% takes exponentially more effort. A “good enough” tune plus flying practice will make you a better pilot faster than endlessly chasing the perfect Blackbox trace. The best tune in the world doesn’t help if you’re spending your battery budget in Betaflight Configurator instead of the air.
FAQ
Can I copy PID values from YouTube or forums?
Use them as starting points, not final values. PIDs are specific to your exact combination of frame, motors, props, weight, and FC. What flies perfectly on a Source One V5 with T-Motor F60 Pro IV motors will oscillate on your Nazgul Evoque with XING2 motors. Learning the tuning methodology means you can optimize any build yourself—that skill transfers to every quad you’ll ever own.
How do I know when my tune is good enough?
When the quad responds crisply, transitions feel smooth, footage has no visible oscillation, motors are warm but not painful after a hard pack, and—most importantly—you’re having fun flying instead of analyzing problems. If you’re overthinking it, you’re done. Go fly.
What’s the difference between PID tuning and rate tuning?
Different things entirely. PIDs control the quality of response—how smoothly and accurately the FC achieves the rotation you commanded. Rates control how much rotation you get per stick deflection. Tune PIDs first to get response quality right. Then adjust rates to match your personal flying style—how fast you want flips, how sensitive center stick feels. Rates are pure preference.
Should I tune with or without a GoPro mounted?
Tune in your typical flying configuration. A GoPro 12 adds about 150g to a 5-inch build, which meaningfully changes flight characteristics. If you usually fly with a camera, tune with the camera. If you fly both ways, tune for the heavier configuration—it’ll still fly fine without the camera, just slightly snappier.
How often should I re-tune?
Only when something changes: new motors, different props, new frame, significant weight change, or if flight feel noticeably degrades. A well-built quad holds its tune for months. If you find yourself re-tuning constantly, suspect a mechanical issue—worn bearings, loose hardware, damaged props—rather than a tuning problem.
My quad flies great on Betaflight defaults. Should I bother tuning?
Not necessarily. Betaflight defaults are well-optimized for common 5-inch builds, and the preset system makes initial setup better than ever. If defaults feel good and you’re enjoying your flying, keep flying. Tuning is optimization, not a requirement. Your stick time matters far more than your PID values for improving as a pilot. If you get curious about squeezing more performance out, the process above is here whenever you’re ready.
I made changes and things got worse. Now what?
Revert to the last known-good values. This is exactly why you change one thing at a time—you know exactly what to undo. If you’ve lost track of what you changed, there’s no shame in restoring Betaflight defaults and starting the process fresh. Every experienced tuner has done this. It’s not failure, it’s the process working as intended.