When 5-inch quads start feeling like a leash—when you want to chase mountain ridgelines, cruise through valleys, and actually go somewhere instead of circling a field—7-inch long-range builds change everything. I’ve built and flown several 7-inch setups, crashed them in places I definitely shouldn’t have been flying, and learned what actually matters for extended exploration. This guide covers building a dedicated long-range platform that’ll get you there and, more importantly, back.
Note: This guide contains affiliate links. If you purchase through our links, we may earn a commission at no extra cost to you. This helps support our testing and content creation.
Why 7-Inch for Long Range
The physics are straightforward: larger props spin slower while moving the same amount of air. A 7-inch prop at 4,000 RPM generates comparable thrust to a 5-inch at 6,000+ RPM, but draws significantly less current. That efficiency gap translates directly into flight time.
On a typical 7-inch build with a 6S 3000mAh LiPo, I consistently get 22-28 minutes of mixed cruising and light exploration. Switch to lithium-ion cells—6S 4000-5000mAh using 21700 cells—and 35-45 minutes becomes realistic at cruise throttle. My personal best was 52 minutes on a calm day with a 6S 6000mAh li-ion pack, though I landed with more anxiety than battery reserve.
The tradeoff is obvious the first time you fly one: these things don’t snap. Where a 5-inch responds to stick input like a sports car, a 7-inch feels more like a touring bike. The larger props take time to change RPM, and the increased momentum means slower direction changes. For exploring canyons or chasing sunsets, that smooth response is actually preferable. For gaps and tricks, stick with your 5-inch freestyle rig.
7-inch makes sense when your goal is covering ground: mountain flying, coastal exploration, crossing large properties, cinematic work requiring extended takes, or simply wanting to see what’s over that next ridge without worrying about battery. If you want a deeper dive into the long-range philosophy and general planning, check out our Long Range FPV Drone Build Guide for broader context before getting into the specifics here.
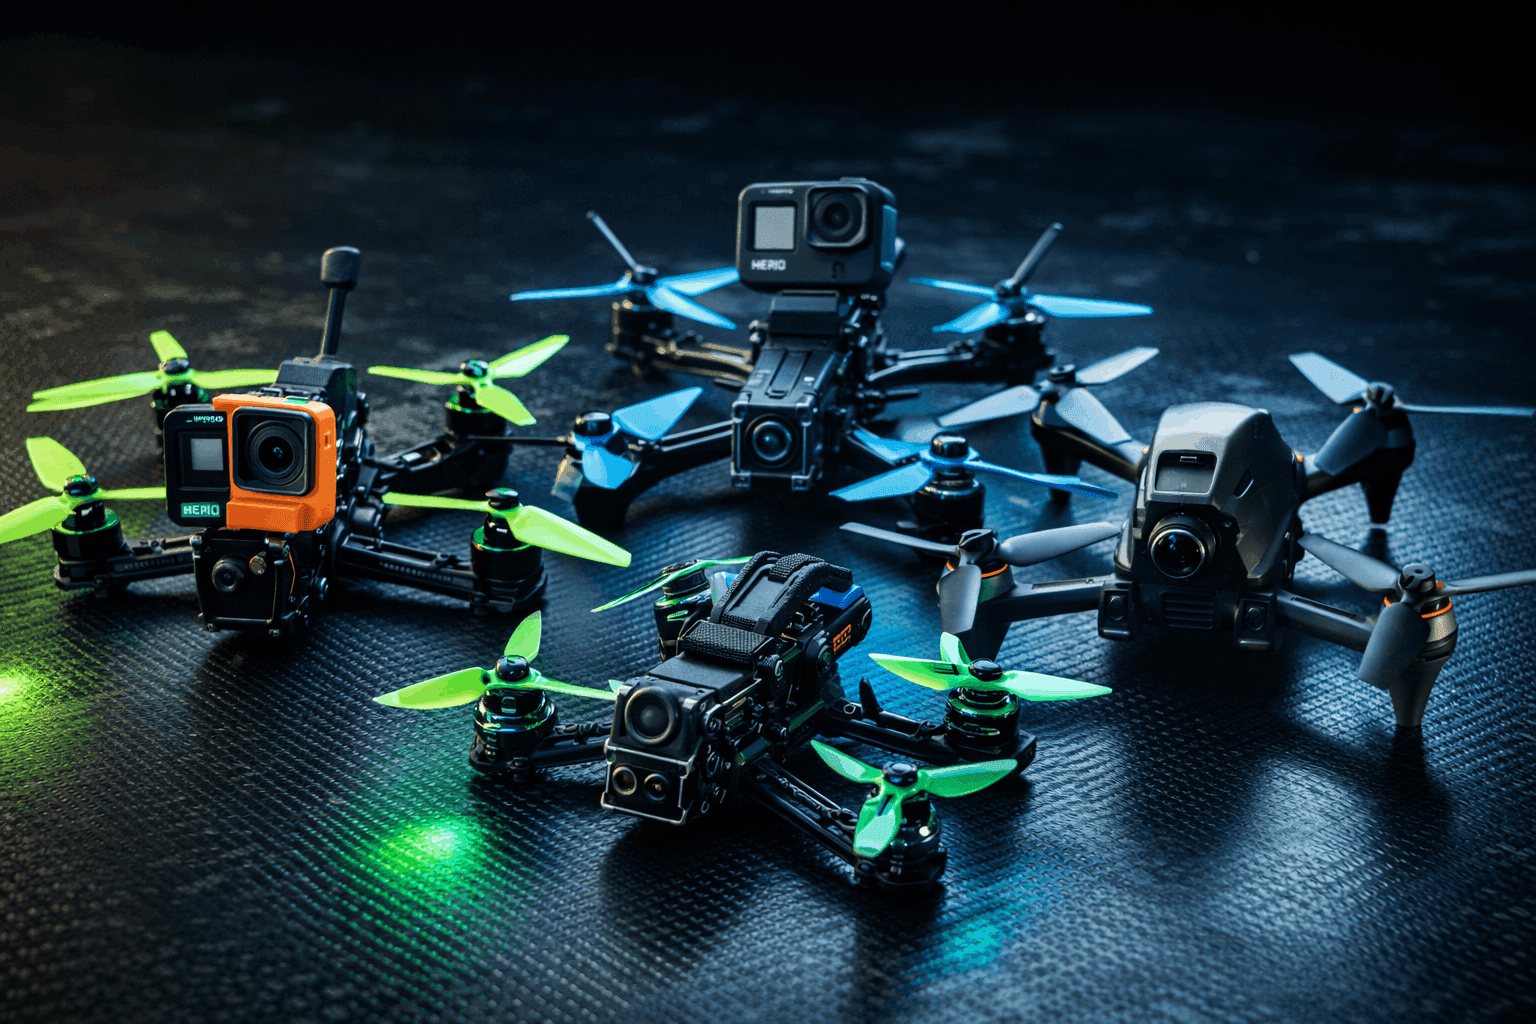
Frame Selection: The Foundation
Your frame choice affects everything downstream—motor mounting, component compatibility, crash durability, and ultimately how far you’re willing to push the envelope when you’re 8 kilometers out.
Wheelbase and Geometry
True 7-inch frames run 310-330mm wheelbase. Deadcat (DC) configurations dominate long-range because they keep props out of your HD camera’s frame during forward flight. Stretched-X designs exist but you’ll fight prop visibility on any nose-down footage.
Top Frame Choices
iFlight Chimera7 Pro V2 (~$85-100 frame kit)
The benchmark long-range frame for good reason. 327mm wheelbase, 6mm arms, full carbon construction weighing around 175g without TPU parts. It’s technically a 7.5-inch frame—the slightly longer arms give you flexibility to run 7” or 7.5” props depending on your efficiency goals. Designed specifically for DJI O3/O4 integration with proper mounting, heatsink, and cable routing. The deadcat geometry keeps props clean in frame, and iFlight’s TPU accessories are widely available. Accepts both 30.5x30.5 and 20x20 stacks, with motor mounting for 16x16mm and 19x19mm patterns. If you want a proven platform with massive community support and readily available replacement arms, start here.
TBS Source One V5/V6 7-inch DC (~$35-45)
The open-source budget king. TBS designed this for the community—files are public, documentation is excellent, and spare parts are cheap and everywhere. 320mm wheelbase, 6mm arms, lighter than the Chimera. The weight savings are real, but you get less protection for electronics and need to source or print your own TPU mounts for camera and antenna. Perfect for pilots comfortable with DIY solutions who prioritize weight savings over turnkey integration. Build quality depends on your source—buy from reputable retailers to ensure proper carbon layup.
GEPRC Crocodile7 GEP-LC7 (~$35-60)
A proven design that’s been refined over several iterations. 315mm wheelbase, 5mm arms. The base LC7 frame is extremely light, while the HD version (GEP-LC7HD) weighs around 174g with all the mounting hardware for digital systems. Compatible with both 6-inch and 7-inch props, which gives you flexibility to experiment with prop size for different missions. The mounting pattern accepts split HD cameras directly with 36x36mm FC holes. Solid budget choice, though arm thickness at 5mm is thinner than competitors—something to consider if you anticipate rough landings in remote locations where snapping an arm means a long walk.
AOS 7 Frame (~$50-70)
A newer contender with excellent reviews for stiffness and crash resistance. 6mm arms, optimized for DJI digital systems. Less community content available compared to Chimera or Source One, but pilots who’ve built on it report clean builds and positive flight characteristics.
For your first 7-inch build, the Chimera7 is the safest choice—extensive documentation, proven reliability, and you’ll find YouTube tutorials for almost any issue. The Source One is the budget pick if you’re comfortable figuring things out yourself.
Motors: Efficiency is Everything
Motor selection makes or breaks long-range efficiency. Forget the 2207 motors on your 5-inch—you need bigger stators to spin larger props efficiently without cooking themselves. If you’re coming from a smaller build, our best FPV motors guide covers how stator dimensions affect performance.
The Right Size
For 7-inch props on 6S, you want 2806.5 or 2807 stators. The “28” indicates 28mm stator diameter, and the “06.5” or “07” indicates 6.5-7mm stator height. This size provides enough torque for 7-inch props without excessive weight.
2808 and 2810 motors exist for heavier builds or 8-inch props—overkill for most 7-inch setups and adds unnecessary weight.
KV Selection
Lower KV means slower spinning at a given voltage, which is what you want for efficiency. For 6S 7-inch builds:
1300KV delivers maximum efficiency, best flight times, and adequate power for cruising and gentle exploration. This is the sweet spot for dedicated long-range cruising.
1500KV is the balanced option—slightly better punch while retaining good efficiency. If you’ll mix in some light freestyle or need to fight wind regularly, this is worth considering.
1700KV gives more responsive stick feel and shorter flight times. Better for pilots who occasionally want to push harder or fly in consistently windy conditions.
Motor Recommendations
iFlight XING 2806.5 1300KV (~$25-34 each)
My go-to recommendation for 7-inch builds. Weighs 53.3g with wire. NSK bearings, N52H arc magnets, titanium shaft, unibell design. Available in 1300KV and 1800KV. The 19x19mm mounting pattern fits the Chimera7 directly. Proven durability across thousands of builds in the long-range community. This is what I run on my primary long-range rig—after two seasons of crashes, mountain flights, and ocean crossings, the bearings are still smooth.
BrotherHobby Avenger 2806.5 (~$28-36 each)
Excellent alternative with NMB bearings and Kawasaki silicon steel stators. Available in 1300KV, 1460KV, 1700KV, and 1920KV options. The 1300KV weighs 41g with short wires—noticeably lighter than the XING. Titanium alloy hollow shaft, N52H arc magnets, 12N14P configuration. The reputation for bulletproof reliability is well earned. Choose this if you prioritize build quality and light weight over every dollar.
Emax ECO II 2807 (~$18-22 each)
The budget efficiency champion. Available in 1300KV, 1500KV, and 1700KV. N52SH magnets, EZO 12mm bearings, 12N14P configuration. Weighs about 47.6g (1300KV, without wire). At this price point, you can afford spares without guilt. Efficiency is competitive with premium options—maybe 5-10% less flight time in direct comparison, but the cost savings let you carry an extra pack. My recommendation for budget builds where you want four solid motors without spending $120+.
T-Motor Pacer V2 2806.5 1300KV (~$30-35 each)
Premium option for pilots who want the best. T-Motor’s quality control is legendary in the hobby. Smooth, efficient, durable. Worth considering if budget isn’t the primary concern and you want that extra peace of mind when you’re 10km out.
Propellers: Often Overlooked
Props can swing efficiency by 15-20%, yet many builders grab whatever’s available. For 7-inch long-range, you want lower pitch and careful blade count selection. Our complete propeller guide covers the physics in detail—here’s what matters for long-range specifically.
Pitch and Blade Count
Pitch affects efficiency dramatically. Higher pitch props (4-4.5” pitch) move more air per revolution but demand more power. Lower pitch (3-3.5” pitch) props sip current at cruise. For long-range, lean toward lower pitch.
Blade count matters too: bi-blade is most efficient, tri-blade offers more thrust and smoother handling at a slight efficiency cost. Most long-range pilots run tri-blade for the handling benefits and accept the minor efficiency penalty—roughly 5-8% less flight time compared to bi-blade, but much better behavior in wind and during direction changes.
Recommended Props
HQProp 7x3.5x3 is the workhorse choice. Good efficiency, predictable handling, widely available. My default recommendation for anyone building their first 7-inch.
Gemfan 7035 is slightly more aggressive than the HQ equivalent. Good compromise between efficiency and responsiveness. I swap to these on windier days.
DAL Cyclone T7056C is a tri-blade with decent efficiency that handles wind well. Popular in the long-range community and the prop GEPRC ships with their Crocodile7 builds for good reason.
HQProp 7x3x2 (bi-blade) offers maximum efficiency for calm conditions. Can feel floaty in wind and less locked-in during turns. Consider these for dedicated efficiency chasing on calm days.
Stock up before you build: 7-inch props are harder to source than 5-inch. Order at least 8-12 props before starting your build. Running out of props mid-project—or worse, mid-season—is frustrating and can ground you for weeks while waiting on shipping.
Battery Strategy: LiPo vs Lithium-Ion
Your battery choice fundamentally shapes the build’s character and capability. This is where the real range decisions happen. For background on LiPo chemistry, safety, and care, see our FPV drone batteries guide.
LiPo Packs
Standard LiPo batteries deliver high discharge rates and punch. For 7-inch long-range, 6S 2200-3000mAh packs are typical.
A 6S 2200mAh quality LiPo weighs around 300-350g and provides 15-20 minutes of mixed flying. A 6S 3000mAh pack weighs around 450-500g and extends that to 20-28 minutes. The heavier pack affects handling and efficiency slightly, but the extra capacity more than compensates.
LiPo advantages: familiar charging infrastructure, good power for occasional aggressive flying, lower initial cost, widely available in the FPV ecosystem.
LiPo limitations: lower energy density means less flight time per gram, and discharge curves drop voltage noticeably as capacity depletes—you’ll feel the quad get sluggish in the last 20%.
Lithium-Ion Packs
Li-ion cells (typically 18650 or 21700) offer significantly higher energy density at the cost of lower discharge capability. For efficiency-focused cruising, this tradeoff is favorable.
A 6S 4000mAh 21700 pack might weigh 400-450g and deliver 30-40+ minutes of cruise time. Some pilots build 6S 6000mAh packs for extreme endurance—the GEPRC VTC6 18650 6S2P configuration is popular for this.
Li-ion advantages: more flight time per gram, flatter voltage curve (more consistent motor response throughout the pack), and they tolerate being stored at higher charge states better than LiPo.
Li-ion limitations: can’t handle aggressive maneuvers without significant voltage sag, requires dedicated li-ion charger settings (different charge voltage and rate than LiPo), and building custom packs requires solid soldering skills and cell-level safety awareness. Read our LiPo battery safety guide—most principles apply to li-ion too, with additional precautions for cell-level assembly.
My Recommendation
Start with LiPo—specifically 6S 2600-3000mAh packs. Learn the quad’s handling, dial in your tune, develop your long-range skills. Once you’re consistently cruising and want more flight time, build or buy li-ion packs for dedicated exploration sessions.
Running both is ideal: LiPo for days when you might mix in some proximity flying or need punch for windy conditions, li-ion for pure long-range exploration on calm days.
Video Transmission: Seeing Far
Long-range video presents unique challenges. At 5-10 kilometers, you need reliable signal through potential obstacles with enough quality to navigate confidently. For a complete comparison of digital systems, see our Walksnail Avatar vs DJI O4 vs HDZero breakdown.
DJI O3 Air Unit (~$179)
The most common choice for digital long-range in 2026. 10km rated transmission range (FCC), 1080p/100fps live feed, 4K/60fps onboard recording, 155° FOV with 1/1.7-inch sensor. Latency sits at 30ms minimum with DJI Goggles 2 at 1080p/100fps—acceptable for cruising, not ideal for tight proximity. 20GB built-in storage means you don’t need a separate SD card for recording.
Integration with Goggles 2 or Goggles 3 provides excellent image quality. Canvas mode OSD integration works well for displaying navigation data like home distance, battery voltage, and GPS coordinates.
Downsides: DJI ecosystem lock-in, the 30ms latency gap versus analog is noticeable if you’re used to zero-latency feeds, and the unit draws close to 2A on the 9V rail—make sure your FC’s voltage regulator can handle it. The Chimera7 Pro V2 is designed for this, but double-check with other frames.
DJI O4 Air Unit Pro (~$219)
The newer option with improved transmission—up to 13km range (FCC) and lower latency at 24ms. Better low-light performance and higher transmission bitrate (60Mbps vs 50Mbps). Worth the $40 premium if you’re starting fresh and buying goggles anyway. If you already have an O3 setup that’s working well, the upgrade isn’t dramatic enough to justify replacing a functional system. Our DJI O4 Air Unit review covers the differences in detail.
Walksnail Avatar / HDZero
Alternative digital systems with loyal followings. Walksnail offers good range and DJI-competitive image quality at a lower ecosystem cost. HDZero provides the lowest latency of any digital system—critical for racing, less important for long-range cruising where you’re rarely threading gaps at speed. Both are viable if you’re already invested in those ecosystems and don’t want to buy DJI goggles.
Analog with High-Power VTX
Don’t discount analog for long-range. A quality 1.6W-2.5W analog VTX with a proper directional antenna setup on your goggles can exceed 20km. Image quality is lower, but latency is effectively zero and total equipment costs are a fraction of digital. For more on the tradeoffs, our analog vs digital FPV comparison breaks it all down.
If you’re budget-constrained or already have analog goggles, a setup like the iFlight BLITZ Whoop 2.5W VTX (~$35-45) paired with a quality camera and directional patch antenna on your goggles works surprisingly well for long-range. You trade image quality for zero-latency feed and dramatically lower cost of entry.
My Recommendation
For most new long-range builds in 2026, DJI O3 offers the best balance of range, quality, and ecosystem support. The price has dropped from original MSRP, making it accessible. Factor total system cost including goggles when comparing—if you’re already in the DJI ecosystem, it’s a straightforward choice.
Control Link: Non-Negotiable
Your control link must exceed your intended flight distance with significant margin. Losing control 8km out means losing the quad. For a deep dive into long-range control systems, our Crossfire vs ELRS comparison covers everything.
ExpressLRS (ELRS)
The community-driven open-source protocol has transformed the control link landscape. Both 2.4GHz and 900MHz variants exist.
ELRS 900MHz provides maximum range—100km+ has been demonstrated in testing, though 20-50km is more typical in real conditions with terrain and obstacles. Lower frequency penetrates obstacles better. Receivers run $20-35 from brands like RadioMaster, iFlight, or HappyModel.
ELRS 2.4GHz offers excellent range (50km+ demonstrated) with higher packet rates for more responsive feel. More receiver options in small form factors. Slightly less penetration through obstacles than 900MHz, but for line-of-sight long-range flying, the difference rarely matters in practice.
For dedicated long-range, 900MHz has the edge. For versatility across different quads (swapping a receiver between your 5-inch and 7-inch), 2.4GHz works great and receivers are smaller. Either way, make sure you’re running ELRS with a compatible radio—the RadioMaster Pocket or any controller from our best FPV controllers guide with an ELRS module works.
TBS Crossfire (~$30 receiver)
The proven premium standard for long-range. Rock-solid reliability, excellent support, and a track record spanning years of extreme long-range flights. If you want certainty and can afford the ecosystem cost (TX module + receivers), Crossfire won’t disappoint. The technology is mature and well-documented.
What I Recommend
ELRS 900MHz for dedicated long-range on a budget. A RadioMaster or iFlight 900MHz receiver paired with a compatible TX module provides exceptional range at accessible prices. The open-source ecosystem means constant improvements and community support.
If you’re already in the Crossfire ecosystem with a TX module and receivers, there’s no compelling reason to switch—both systems exceed what you’ll realistically need.
GPS: Your Safety Net
For long-range flying, GPS isn’t optional—it’s the difference between recovering your quad and losing it in a field 8km away.
Why GPS Matters
GPS enables GPS Rescue mode in Betaflight, which autonomously returns the quad if you lose video or control signal. It also provides accurate home distance and direction in your OSD, flight logs with position data for finding crashed quads, and position hold capability for hovering while you assess a situation. If you later venture into iNav or ArduPilot, GPS also enables waypoint missions for automated survey-style flights.
GPS Module Recommendations
Matek M8Q-5883 (~$25) integrates GPS and compass in one module. Fast satellite acquisition, reliable performance, well-documented. My standard recommendation for any long-range build.
BN-880 (~$15-20) is a budget-friendly GPS+compass combo. Slightly slower acquisition but perfectly functional once locked. Good for budget builds where you need GPS but every dollar counts.
Flywoo GOKU Mini GPS V3 (~$18-22) is a compact option designed for space-constrained builds. Fast lock times and small footprint.
BetaFPV M10 GPS (~$20-25) uses the newer u-blox M10 chipset with good reviews for acquisition speed and accuracy.
Installation Tips
Mount GPS with the antenna facing up, away from carbon fiber (which blocks GPS signal) and interference sources like the VTX and motors. Most long-range frames include a dedicated GPS mount position—use it. If your module includes a compass, calibrate it after every location change and keep it as far from high-current wiring as possible.
Test GPS lock before every flight. Wait for 8+ satellites before taking off. Your OSD should display satellite count—don’t launch with fewer than 8. In cold weather or new locations, first lock can take 2-3 minutes. Be patient—this isn’t the place to cut corners.
Flight Controller and ESC Stack
The brains and muscle of your build. For 7-inch long-range, you want reliability and clean power delivery over racing features.
Flight Controller Selection
Any modern F4 or F7 flight controller works for long-range. Key features to look for: dedicated GPS UART, enough UARTs for receiver, GPS, and VTX control simultaneously, adequate voltage regulators (especially for DJI systems drawing up to 2A on the 9V rail), and a quality gyro. BMI270 or ICM-42688-P are preferred over the aging MPU6000—they offer better noise performance, which matters when running large props at low RPM.
iFlight BLITZ F722 comes standard in Chimera7 builds. Solid all-around performer with proper DJI power delivery and enough UARTs for a full long-range configuration. If you’re building on the Chimera7 frame, this is the path of least resistance.
SpeedyBee F405 V4 is the budget option with an excellent feature set. Good for builds where you’re sourcing components separately and want to save without sacrificing reliability.
Matek F722-SE is popular in the long-range community specifically for its excellent GPS support, clean power delivery, and comprehensive documentation.
ESC Selection
For 7-inch with 2806.5 motors, 45-55A ESCs provide adequate headroom. You won’t pull sustained high amps on a long-range build, but the headroom handles startup current and occasional aggressive inputs. Run BLHeli_32 or AM32 firmware for RPM filtering and bidirectional DShot support.
iFlight BLITZ E55 4-in-1 pairs naturally with the BLITZ F722 in stack form. 55A rating handles everything a 7-inch build can throw at it.
SpeedyBee BLS 50A 4-in-1 is a good budget option with solid performance and reliable firmware support.
Stack vs Separate
Most 7-inch builds use stacks (FC+ESC combined unit) for simplicity. Unless you’re optimizing every gram for a competition build, stacks simplify wiring, reduce potential failure points, and make troubleshooting easier. When you’re 10km out, fewer solder joints means fewer things that can go wrong.
Build Considerations Specific to 7-Inch
Building a 7-inch differs from 5-inch in several important ways. If this is your first build of any kind, start with our how to build your first FPV drone guide for fundamentals, then come back here for 7-inch specifics.
Weight Distribution
Battery placement critically affects handling. Front-heavy causes difficulty maintaining altitude and wastes energy fighting pitch-up tendency. Tail-heavy creates twitchy pitch response and efficiency losses from constant correction. Test hover stability before committing to long flights—adjust battery placement fore/aft until the quad hovers level without needing pitch trim in Betaflight.
Most frames mount batteries on top. Some pilots prefer bottom-mounting for heavier li-ion packs to lower the center of gravity. Experiment during your tuning phase.
Antenna Placement
You’re investing in range capability—don’t sabotage it with poor antenna placement. Our FPV antenna guide covers the theory, but for 7-inch specifically: GPS antenna must point up with clear sky view, unobstructed by carbon. Control link antenna (ELRS/Crossfire) needs to be positioned away from the carbon frame shadow—use an antenna tube pointing backward at 45° for best coverage during forward flight. VTX antenna should be clear of frame obstruction in all orientations. Use antenna tubes to protect everything and maintain consistent positioning through crashes.
Wiring Quality
At 10km out, a cold solder joint means a lost quad. Take extra care with your soldering—our FPV soldering guide covers proper technique if you need a refresher. Use quality XT60 connectors (genuine Amass, not cheap knockoffs that can arc under load), proper solder joints with good flow, strain relief on battery leads, and secure all wires against vibration with zip ties or tape. Heat shrink every exposed connection. On a 5-inch, sloppy wiring means a crash at the field. On a 7-inch long-range, sloppy wiring means losing the entire quad.
Tune Considerations
7-inch quads typically need lower PIDs than 5-inch. The larger props respond more slowly, and aggressive PIDs cause oscillation—especially visible as prop wash during descents. Start with a conservative tune and increase cautiously. Many Chimera7 builds fly well on slightly modified Betaflight defaults. Our PID tuning guide covers the fundamentals, and the freestyle-specific tuning guide has relevant filter advice.
RPM filtering is particularly valuable for larger props. The lower rotation frequencies are harder to filter with conventional notch methods, and bidirectional DShot with RPM filtering handles this cleanly. Enable it—the improvement on 7-inch builds is more dramatic than on 5-inch.
Flight Techniques for Long Range
Equipment only gets you so far. Successful long-range flying requires technique and planning.
Efficient Cruising
Constant throttle beats varying throttle for efficiency. Find a throttle position that maintains altitude and airspeed, then hold it. Frequent throttle adjustments waste energy—every acceleration and deceleration is current the motors could have used covering distance.
Altitude matters. Higher altitude often means less ground-level turbulence and better VTX/control signal (fewer obstacles between you and the quad). Trade altitude for distance when needed—a shallow descent covers ground efficiently while using almost zero battery.
Navigation Fundamentals
Your OSD should display home distance and direction at minimum. I also run battery voltage, mAh consumed, flight timer, and GPS satellite count. Know your numbers cold—how many mAh you can safely use before return, what voltage triggers your turnaround point.
Plan your route mentally before launching. Identify landmarks, potential emergency landing spots if something goes wrong, and no-fly zones in your path. For guidance on where you can legally fly, check our best places to fly FPV drones guide.
Return Planning
The cardinal rule of long-range: never fly further than you can return from. Calculate return requirements conservatively.
Account for headwind on return—wind that helped you outbound will fight you coming back. Reserve 20-30% battery capacity for return rather than splitting 50/50 between outbound and return. Know your efficiency numbers in mAh per minute at cruise, and have predetermined abort points where you turn back regardless of remaining battery.
If outbound takes 1500mAh and you have a 3000mAh pack, don’t assume 1500mAh return is sufficient. Headwind, required altitude changes, or navigating around obstacles could demand significantly more. I use a 60/40 rule: 60% return reserve, 40% outbound. That feels conservative until the day a headwind picks up and you’re grateful for the margin.
Weather Awareness
Wind at 100m altitude often differs dramatically from ground conditions. Check forecast apps that show wind at various altitudes before flying—the surface being calm doesn’t mean it’s calm at your cruise altitude.
Thermals affect efficiency and handling. Rising air over sun-heated surfaces like parking lots and dark fields creates lift (good for extending range), while sinking air over cool surfaces like water and forest costs altitude and battery.
Temperature affects battery performance directly. Cold weather reduces LiPo capacity by 10-20% and increases internal resistance. Hot weather can cause thermal throttling on your VTX. Plan for seasonal performance differences.
Sample Builds by Budget
Budget Build (~$400-500 airframe only)
| Component | Part | Price |
|---|---|---|
| Frame | TBS Source One V5 7-inch DC | ~$40 |
| Motors | Emax ECO II 2807 1300KV x4 | ~$75 |
| FC/ESC | SpeedyBee F405 V4 + BLS 50A stack | ~$85 |
| VTX | iFlight BLITZ Whoop 1.6W (analog) | ~$35 |
| Camera | Foxeer Razer Mini | ~$25 |
| Receiver | ELRS 900MHz | ~$25 |
| GPS | BN-880 | ~$15 |
| Props | HQProp 7x3.5x3 | ~$15 |
| Misc | Wiring, antenna, hardware | ~$30 |
Total: ~$345 without battery, goggles, or radio. Expect 20-25 minute flight times with a 6S 2600mAh LiPo. This build gets you in the air for long-range exploration on an analog system. Pair it with goggles you already own and a directional patch antenna for maximum range on a budget.
Mid-Range Build (~$700-900 airframe only)
| Component | Part | Price |
|---|---|---|
| Frame | iFlight Chimera7 Pro V2 | ~$85-100 |
| Motors | iFlight XING 2806.5 1300KV x4 | ~$100-135 |
| FC/ESC | iFlight BLITZ F722 + E55 stack | ~$110 |
| VTX | DJI O3 Air Unit | ~$179 |
| Receiver | ELRS 900MHz | ~$30 |
| GPS | Matek M8Q-5883 | ~$25 |
| Props | HQProp 7x3.5x3 | ~$15 |
| Misc | Wiring, antennas, hardware | ~$35 |
Total: ~$580-630 without battery, goggles, or radio. This is the sweet spot build. Expect 25-30+ minutes with a 6S 3000mAh LiPo, and 35+ minutes with a li-ion pack. The Chimera7 + XING + O3 combination is proven across thousands of builds and has extensive community tuning resources.
Premium Build (~$1000+ airframe only)
| Component | Part | Price |
|---|---|---|
| Frame | iFlight Chimera7 Pro V2 O4 | ~$100 |
| Motors | BrotherHobby Avenger 2806.5 1300KV x4 | ~$120-140 |
| FC/ESC | Premium stack (BLITZ or equivalent) | ~$120 |
| VTX | DJI O4 Air Unit Pro | ~$219 |
| Receiver | TBS Crossfire Nano RX or ELRS diversity | ~$30-40 |
| GPS | Matek M8Q-5883 | ~$25 |
| Props | HQProp 7x3.5x3 | ~$15 |
| Misc | Premium wiring, connectors | ~$40 |
Total: ~$670-700 without battery, goggles, or radio. Expect 30-40+ minutes with a 6S li-ion pack. This build prioritizes reliability and performance at every component level—lighter motors, better video transmission, and proven control link. The premium isn’t dramatic over mid-range, but the weight savings from Avenger motors and improved O4 range add up over hundreds of flights.
For a broader look at build costs across all styles, our FPV racing setup cost breakdown gives context on where your money goes.
Legal and Safety Considerations
Long-range flying intersects with regulations more than backyard proximity flying. Our FPV drone laws guide covers regulations comprehensively—here’s what matters specifically for long-range.
Visual Line of Sight (VLOS)
Most jurisdictions require VLOS—you must be able to see your aircraft at all times. Flying 10km clearly exceeds this. Options include flying with a spotter who maintains visual contact, obtaining Beyond Visual Line of Sight (BVLOS) authorization from your aviation authority, or flying in areas with less restrictive airspace rules (varies dramatically by country).
Research your local regulations thoroughly before pushing distance. Getting caught flying illegally can result in significant fines and harms the hobby for everyone. Consider FPV drone insurance regardless of where you fly—equipment this expensive deserves protection.
GPS Rescue Configuration
GPS Rescue is your safety net—configure it correctly before relying on it. Set rescue altitude higher than any obstacles between you and home. Test in a safe, open area at close range before trusting it for real. Understand what triggers rescue (failsafe, switch activation) and set appropriate sanity checks in Betaflight.
GPS Rescue isn’t perfect—it can fail in unusual circumstances like GPS drift near tall structures or during extreme magnetic interference. Don’t fly beyond what you’re willing to lose entirely. The technology is a safety net, not a guarantee.
Remote Site Safety
Flying in remote locations introduces risks beyond equipment failure. Tell someone where you’re going and when you expect to return. Carry communication—cell phone at minimum, satellite messenger for truly remote locations. Bring appropriate supplies for the environment: water, sun protection, charged phone, and a plan for retrieving a crashed quad on foot if it goes down 2km away in rough terrain.
Common Questions
What flight time can I realistically expect? With an efficient build and LiPo: 20-30 minutes is achievable. With li-ion: 35-45+ minutes is possible at steady cruise. For real-world planning, assume 70-80% of theoretical maximum to account for wind, navigation needs, and reserve battery.
Is 7-inch good for freestyle? It can handle gentle rolls, split-S turns, and flowing lines, but it’s not built for aggressive tricks. The physics favor efficiency over snap response. For aggressive freestyle, 5-inch is better. Many pilots own both: 5-inch for tricks and proximity, 7-inch for distance and cinematic work.
ELRS 900MHz vs 2.4GHz for long range? 900MHz offers slightly better range and obstacle penetration. 2.4GHz offers higher packet rates and more receiver options. Both work excellently for realistic long-range flying under 20km. 900MHz has the edge for maximum distance; 2.4GHz is more versatile if you use the same radio across multiple quads.
Can I convert my 5-inch to long range? Not effectively. 5-inch frames won’t fit 7-inch props, and the efficiency gap is fundamental physics. You can optimize a 5-inch for extended range with efficient props and a larger battery, but it won’t match 7-inch efficiency. Build a dedicated 7-inch rather than compromising both platforms.
How critical is GPS? For true long-range flying, GPS is non-negotiable. Without GPS Rescue, a video or control loss kilometers out means a lost quad with no way to recover it. The weight penalty (~15-20g) is insignificant compared to the safety and capability GPS provides. Every long-range build should have GPS—no exceptions.
What goggles do I need? Depends on your VTX choice. For DJI O3/O4, you need DJI Goggles 2, Goggles 3, or FPV Goggles V2. Our best FPV goggles guide covers all options across digital and analog systems.
Final Thoughts
Building a 7-inch long-range quad isn’t dramatically harder than building a 5-inch—it’s different priorities. Where racing builds optimize for response and power, long-range builds optimize for efficiency and reliability at every decision point.
Start with proven components: Chimera7 frame, XING or Avenger motors, quality flight stack, reliable ELRS control link, and GPS. Get it flying, learn its characteristics, dial in the tune, and gradually extend your range as confidence and familiarity grow.
The magic of long-range FPV isn’t about chasing maximum distance numbers—it’s about reaching places you couldn’t before and returning with footage of somewhere genuinely interesting. Build smart, fly conservatively, and the 7-inch platform will reward you with flights you’ll remember.